The Best Homemade Vanilla Cake Recipe (Soft, Fluffy & From Scratch)
There is something quietly special about a great vanilla cake. No dramatic flavours, no fancy tricks — just a beautifully soft, tender crumb, a sweet buttery fragrance, and a frosting that is smooth and creamy all the way through.
This is the recipe I come back to for every birthday, every celebration, and every time someone says “I just want a really good cake.” It is beginner-friendly, made with everyday ingredients, and it works every single time.
What You Will Need Before You Start
Ingredients at a Glance
| Ingredient | Amount | Approx. Cost (USA) |
|---|---|---|
| All-purpose flour | 2½ cups (315g) | ~$0.40 |
| Baking powder | 2½ tsp | ~$0.10 |
| Salt | ½ tsp | ~$0.03 |
| Unsalted butter (softened) | ¾ cup (170g) | ~$1.20 |
| Granulated sugar | 1¾ cups (350g) | ~$0.55 |
| Eggs (large) | 4 | ~$1.20 |
| Pure vanilla extract | 1 tbsp | ~$0.45 |
| Whole milk (room temp) | 1 cup (240ml) | ~$0.30 |
| Sour cream (room temp) | ¼ cup (60g) | ~$0.35 |
| Total estimated cost | — | ~$4.58 for 12 servings |
Why sour cream? It sounds unusual, but sour cream adds moisture and a very subtle tang that makes the crumb incredibly tender. It is the secret behind bakery-style vanilla cakes.
For the Vanilla Buttercream Frosting
| Ingredient | Amount | Approx. Cost (USA) |
|---|---|---|
| Unsalted butter (softened) | 1½ cups (340g) | ~$2.25 |
| Powdered sugar | 5 cups (600g) | ~$1.30 |
| Heavy cream | 3–4 tbsp | ~$0.40 |
| Pure vanilla extract | 2 tsp | ~$0.30 |
| Pinch of salt | — | ~$0.02 |
| Total frosting cost | — | ~$4.27 |
Equipment You Will Need
- Two 9-inch (23cm) round cake pans
- Large mixing bowl and a medium bowl
- Electric hand mixer or stand mixer
- Rubber spatula
- Wire cooling rack
- Offset spatula or butter knife (for frosting)
- Measuring cups and spoons
1. Prepare Your Pans and Preheat the Oven
Preheat your oven to 350°F (175°C) and let it fully come to temperature before anything goes in — this is non-negotiable for even baking.
Grease both 9-inch round cake pans generously with softened butter or baking spray. Cut two circles of parchment paper to fit the bottoms, press them in, and grease the parchment too.
This double-grease step is what guarantees your cakes release cleanly without tearing.
2. Mix the Dry Ingredients
In a medium bowl, whisk together:
- 2½ cups all-purpose flour
- 2½ tsp baking powder
- ½ tsp salt
Whisk for about 30 seconds so everything is evenly distributed. Set this bowl aside — you will add it in stages later.
Measure flour correctly. Do not scoop the measuring cup directly into the flour bag — this packs the flour and gives you too much. Instead, spoon flour into the measuring cup and level it off with a straight edge.
3. Cream the Butter and Sugar
In a large bowl, beat the softened butter with an electric mixer on medium-high speed for 2 minutes until pale and creamy.
Add the granulated sugar and continue beating for 3 to 4 minutes more. The mixture should look noticeably lighter in colour and very fluffy. Do not rush this step — this is what gives the cake its lift and tender texture.
Butter not soft enough? Cut it into cubes and microwave in 5-second bursts until it gives when pressed but is not melted.
4. Add Eggs and Vanilla
Add the 4 eggs, one at a time, beating well after each addition. Adding them one by one gives the batter time to emulsify properly — adding all four at once can make the batter curdle.
Scrape down the sides of the bowl with a rubber spatula after the second and fourth egg.
Add the 1 tablespoon of pure vanilla extract and beat until incorporated. Use pure vanilla extract, not imitation — the difference in flavour is very noticeable in a vanilla-forward cake.
5. Alternate Adding Dry Ingredients and Milk
This is the step that most home bakers skip or rush — and it makes a real difference.
With the mixer on low speed, add the dry ingredients and milk in alternating additions:
- Add ⅓ of the flour mixture — mix until just combined
- Add ½ of the milk — mix until just combined
- Add another ⅓ of the flour — mix until just combined
- Add the remaining milk — mix until just combined
- Add the last ⅓ of the flour — mix until just combined
Finally, fold in the ¼ cup sour cream gently with a rubber spatula.
Do not overmix at this stage. Once the flour is in, overmixing develops gluten and makes the cake tough. Mix only until you can no longer see dry streaks.
6. Pour and Bake
Divide the batter evenly between your two prepared pans. Smooth the tops with a spatula so they are level.
Place the pans side by side on the centre rack of your preheated oven. Bake for 28 to 33 minutes.
How to tell when it is done: The top of the cake should be lightly golden and spring back when touched in the centre. Insert a toothpick — it should come out clean or with just a dry crumb or two, not wet batter.
7. Cool Completely on a Wire Rack
Remove the pans from the oven. Let the cakes cool in their pans for 15 minutes — they will pull away from the edges slightly as they cool, which makes releasing easier.
Run a thin knife gently around the edge of each pan, then flip the cakes out onto a wire rack. Peel off the parchment paper and let the layers cool completely — at least 1 to 2 hours.
Shortcut: Once the cakes are cool, wrap them tightly in plastic wrap and refrigerate for up to 2 days. Cold cake layers are firmer and much easier to frost without crumbs tearing up.
8. Make the Vanilla Buttercream Frosting
Beat the softened butter with an electric mixer on medium-high for 3 to 4 minutes until it is very pale, almost white, and fluffy. This extra beating time is what makes the frosting silky rather than greasy.
Add the powdered sugar one cup at a time, mixing on low after each addition to avoid a cloud of sugar. Once all the sugar is in, add the heavy cream (start with 3 tablespoons), vanilla extract, and pinch of salt.
Beat on medium-high for 2 to 3 more minutes until the frosting is smooth, bright white, and completely lump-free.
Frosting Consistency Guide
| Issue | Fix |
|---|---|
| Too thick, tears the cake | Add heavy cream, 1 tsp at a time |
| Too thin, slides off | Add powdered sugar, 2 tbsp at a time |
| Looks greasy or curdled | Butter was too warm — refrigerate for 10 min then beat again |
| Too sweet | Add a pinch more salt and a squeeze of lemon juice |
9. Assemble, Frost, and Serve
Place one cake layer on your serving plate or cake stand, flat side up. Spread a generous layer of frosting over the top — about ¾ cup — and smooth it to the edges.
Place the second layer on top, flat side down. Press gently to level.
Apply a crumb coat first: a thin, even layer of frosting all over the top and sides. Refrigerate for 15 to 20 minutes until the crumb coat is firm. This traps any loose crumbs so your final layer looks smooth and clean.
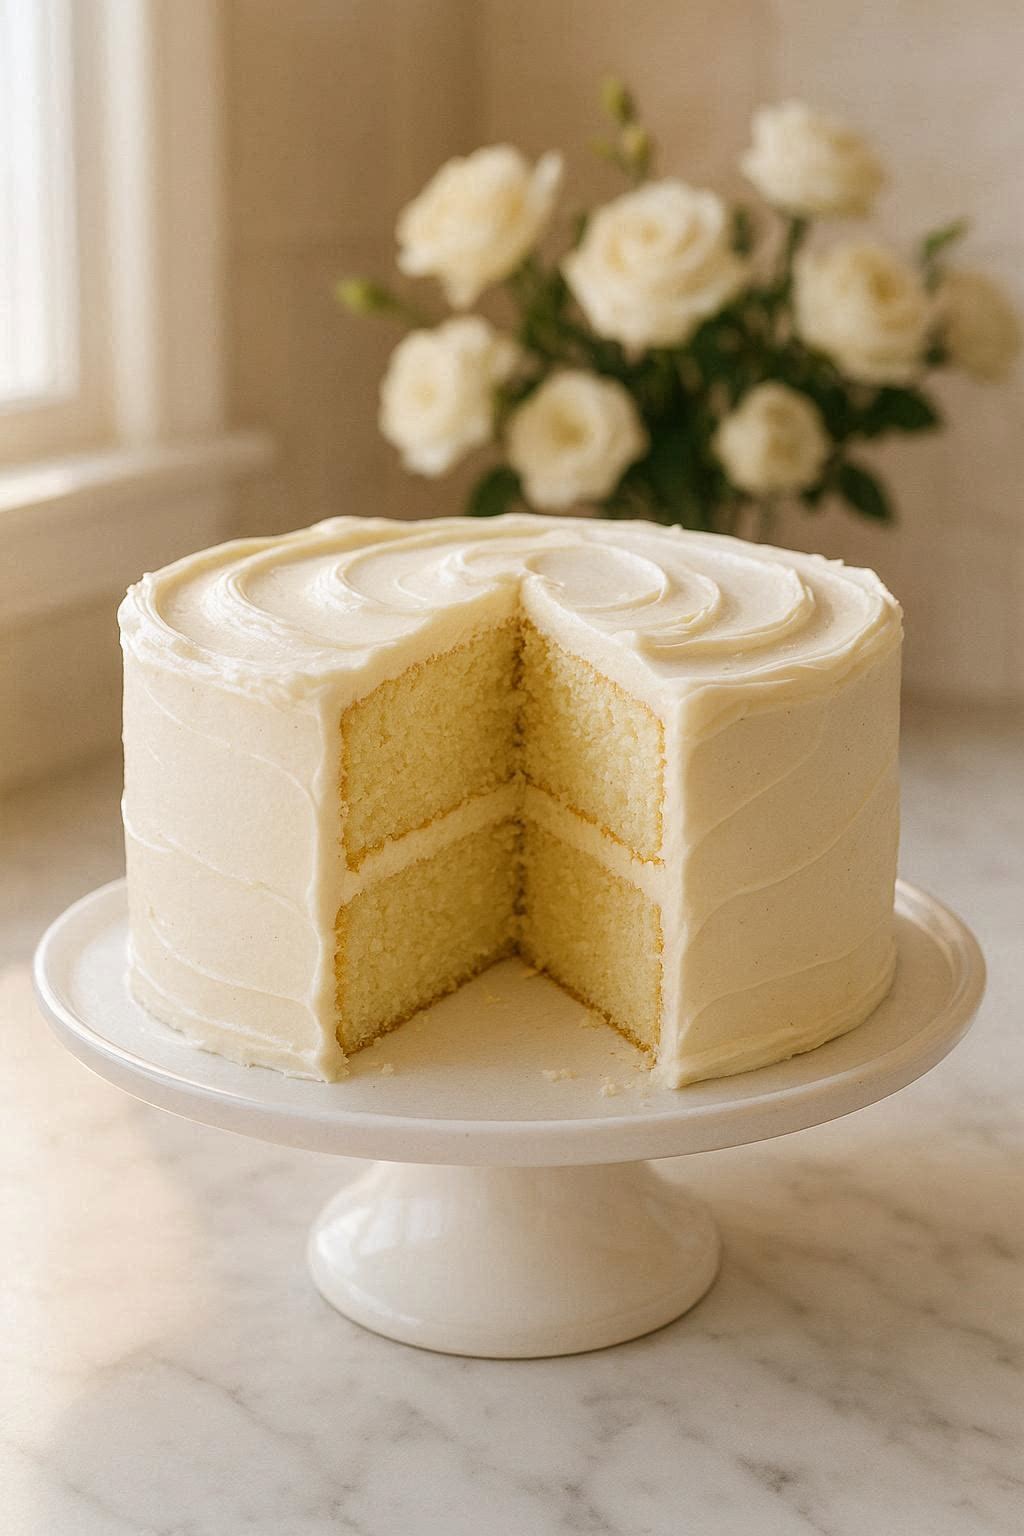
Apply the remaining frosting generously over the top and sides. Use an offset spatula for a smooth finish, or the back of a spoon for soft swirls.
Quick Reference: Storing Your Vanilla Cake
| Storage Method | How Long It Keeps | Tips |
|---|---|---|
| Room temperature (covered) | Up to 3 days | Keep away from direct sunlight |
| Refrigerator (covered) | Up to 5 days | Bring to room temp 30 min before serving |
| Freezer — unfrosted layers | Up to 3 months | Wrap tightly in plastic + foil |
| Freezer — frosted cake | Up to 2 months | Freeze uncovered first, then wrap |
Final Thoughts
A great vanilla cake does not need to be complicated. With the right technique — properly creamed butter, alternating wet and dry additions, and a truly fluffy buttercream — this cake comes out soft, fragrant, and beautiful every single time.
At roughly $4.50 for the whole cake, it is one of the most satisfying things you can bake from scratch. Whether it is for a birthday, a weekend treat, or simply because you want to fill the house with the smell of vanilla and butter, this recipe will not let you down.
Try it once, and I promise it becomes your go-to. Happy baking! 🍰