15 Beautiful Blackberry Trellis Ideas That Actually Work in Any Backyard

Introduction
If you’ve ever grown blackberries, you already know — those canes go everywhere. Without a trellis, you’ve got a thorny mess that’s hard to harvest and even harder to manage. But with the right support system? You get a neat, productive, gorgeous feature that looks like it belongs on a farmhouse Instagram page.
This guide walks you through 15 real blackberry trellis ideas, from budget DIY setups to designer-worthy garden structures. We’ll cover what materials to buy, how to build or install each one, and what actually works for different yard sizes and budgets.
Section 1: Understanding Blackberry Trellis Basics
1.1 Why Blackberries Need a Trellis
Blackberry canes grow 6–10 feet long. Without support, they flop over, get diseases from poor airflow, and become nearly impossible to harvest. A good trellis:
- Keeps canes off the ground
- Improves air circulation (less disease)
- Makes pruning and picking much easier
- Turns a messy plant into a clean garden feature
1.2 Choosing the Right Trellis System
| Trellis Type | Best For | Cost Range | Lifespan |
|---|---|---|---|
| T-post + Wire | Large rows, serious growers | $30–$80 | 15–20 years |
| Wood Post + Wire | Home gardens, rustic look | $50–$120 | 8–12 years |
| Fence Panel | Small spaces, renters | $40–$90 | 10–15 years |
| Arbor/Arch | Decorative focal point | $80–$300 | 10–20 years |
| PVC Pipe | Temporary or test gardens | $15–$40 | 3–5 years |
| Cattle Panel | Thornless varieties, easy | $60–$100 | 20+ years |
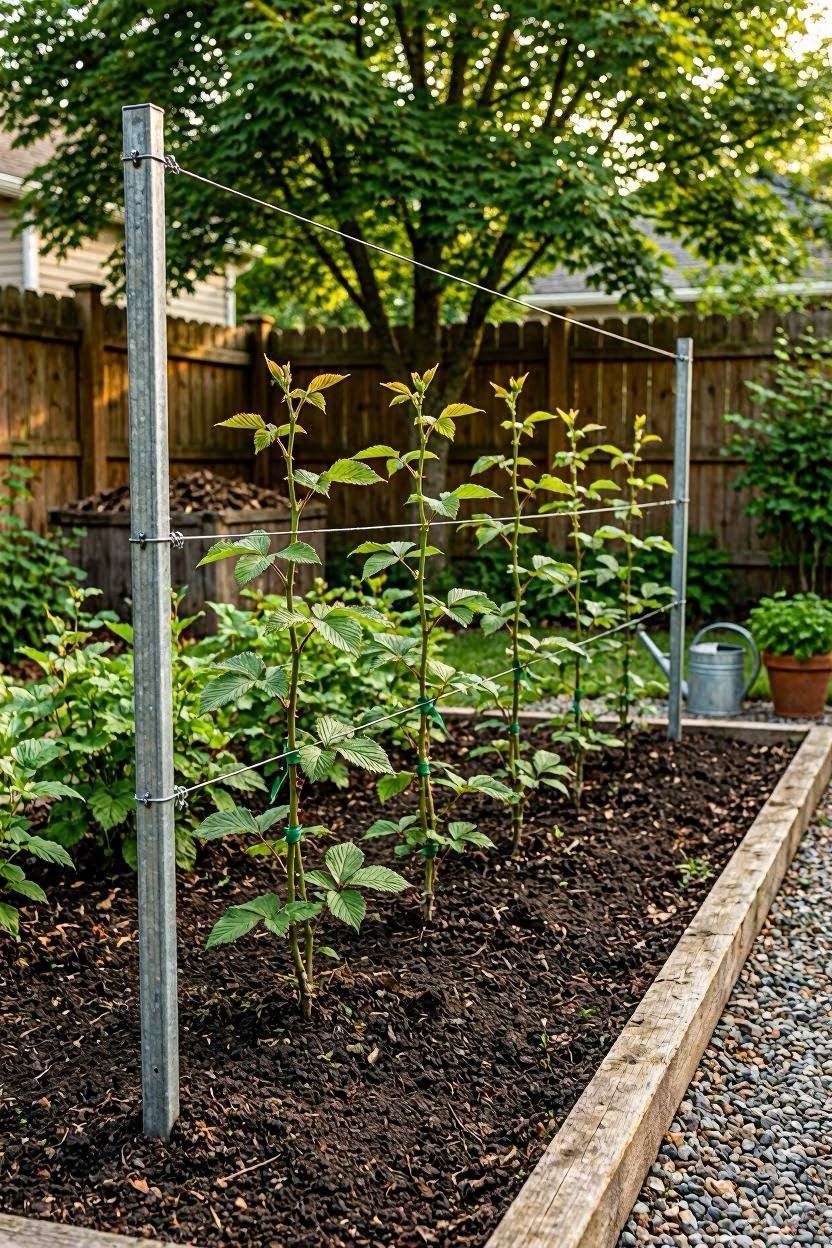
Section 2: The Classic T-Post Wire Trellis
2.1 What It Is
This is the most common system used by home gardeners and small farms across the USA. You sink T-posts into the ground every 15–20 feet, then run two or three horizontal wires between them. Canes are tied to the wires as they grow.
2.2 Step-by-Step Setup
What you need:
- Metal T-posts (6 ft tall) — about $4–$6 each at Home Depot or Tractor Supply
- 12.5-gauge galvanized wire — $20–$30 for 100 ft
- Wire tensioners or turnbuckles — $5–$10
- A post pounder or sledgehammer
Steps:
- Mark your row with string or chalk line
- Drive end posts 2 ft into the ground, angled slightly outward
- Space middle posts every 15–20 ft along the row
- Attach wire at 3 ft and 5 ft heights along the posts
- Tighten wire with tensioners so it holds cane weight without sagging
- Tie new canes to the lower wire, fruiting canes to the upper wire
Cost estimate: $60–$100 for a 20-foot row
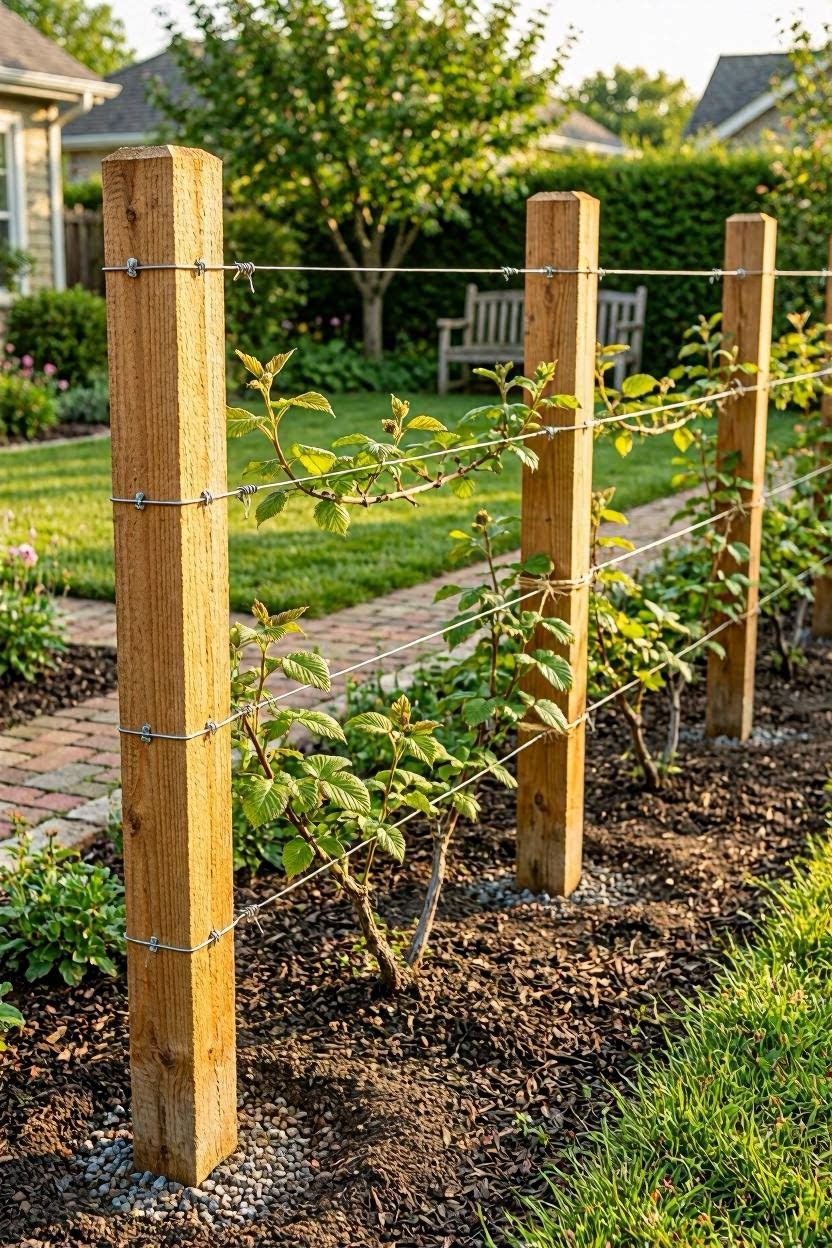
Section 3: Wood Post and Wire Trellis
3.1 Why Wood Looks Better in Home Gardens
Metal T-posts are functional but not pretty. If your trellis is visible from your patio, deck, or street — go with wood posts. Cedar or pressure-treated pine posts look clean and natural, and they blend beautifully with garden beds.
3.2 Best Wood to Use
| Wood Type | Cost per Post | Rot Resistance | Best For |
|---|---|---|---|
| Cedar (4x4) | $12–$18 | High | Visible garden areas |
| Pressure-treated pine | $8–$12 | Very High | Long-term rows |
| Black locust | $10–$15 | Extremely High | Wet climates |
| Douglas fir | $7–$10 | Medium | Dry climates only |
3.3 Setup Steps
- Dig post holes 2 ft deep (use a post hole digger or rent one for $30/day)
- Set posts in concrete — one bag of fast-setting Quikrete per post ($6 at Home Depot)
- Let concrete cure 24 hours before tensioning wire
- Run 14-gauge galvanized wire at 18 in, 36 in, and 54 in heights
- Use eye bolts on each post to anchor the wire cleanly
Cost estimate: $90–$150 for a 20-foot row
Section 4: Fence Panel Trellis Ideas
4.1 Using an Existing Fence
If you already have a wood or vinyl privacy fence, you’re halfway there. Blackberry canes can be trained flat against a fence using wire guides or hook-and-eye screws. This works especially well for thornless varieties like Triple Crown or Chester.
Steps:
- Screw eye hooks into fence boards every 18 inches horizontally
- Thread galvanized wire or jute twine through the hooks at 2 ft and 4 ft heights
- Tie canes to the wire as they grow, weaving them horizontally
4.2 Decorative Lattice Panel Trellis
For a more polished look, install a cedar lattice panel between two posts. Weave canes through the lattice openings as they grow. This looks stunning against a painted wall or stucco exterior.
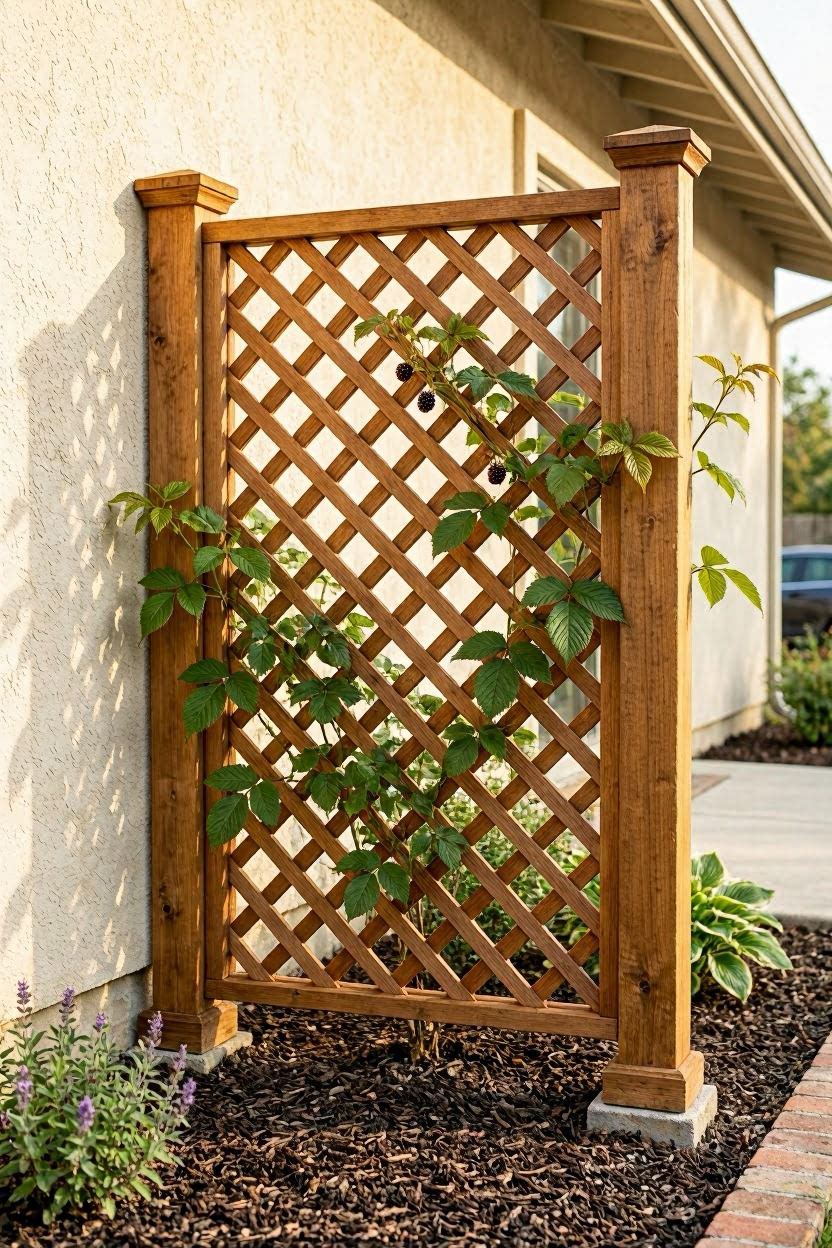
Cost estimate: $50–$100 including lattice panel and hardware
Section 5: Cattle Panel Trellis — The Hidden Gem
5.1 Why Gardeners Love Cattle Panels
Cattle panels are rigid 16-foot steel panels with a grid pattern, originally made for livestock fencing. They cost $30–$50 at Tractor Supply or Rural King, and they’re one of the sturdiest, most versatile trellis options you can buy.
5.2 How to Use Them for Blackberries
Flat against a fence or wall:
- Secure the panel vertically between two T-posts
- Weave canes through the grid horizontally
As a freestanding arch:
- Bend the panel into a U-shape or arch
- Anchor both ends into the ground
- Let canes climb up and over — berries hang inside the tunnel for easy picking
Cost estimate: $50–$80 installed
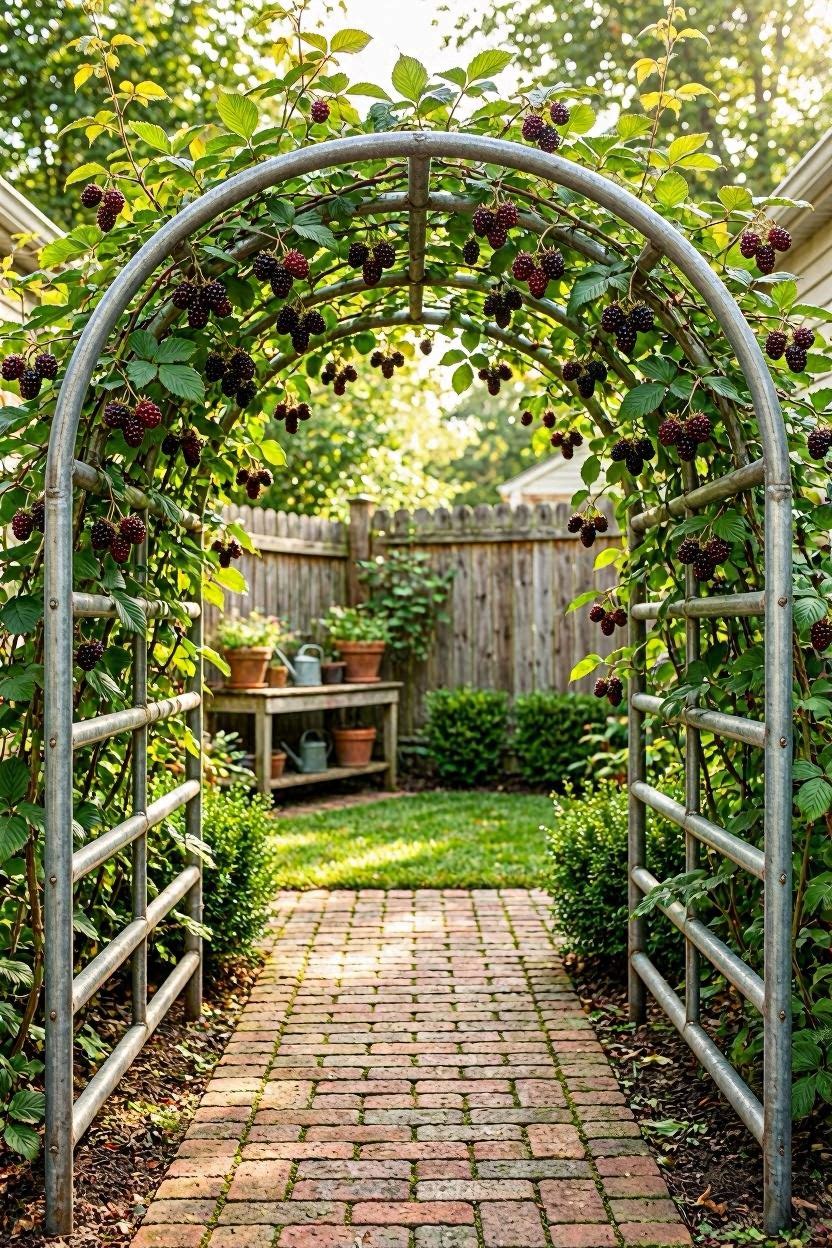
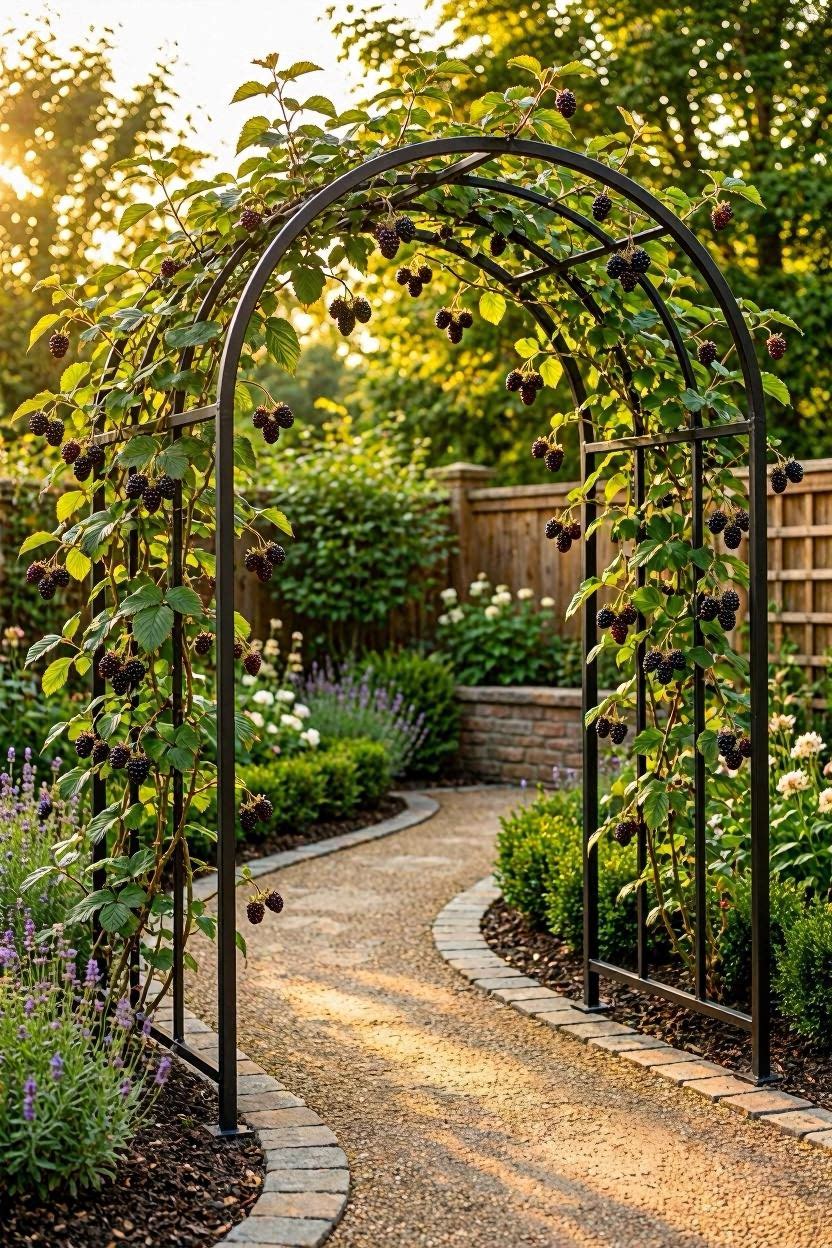
Section 6: Decorative Arbor and Arch Trellis Ideas
6.1 When Function Meets Design
If your blackberries are near a garden entrance, patio, or path — an arbor trellis turns the plant into a focal point. As canes fill in, you get a natural canopy of leaves and berries overhead. It’s one of the most visually striking setups in any garden.
6.2 Best Arbor Styles for Blackberries
| Style | Material | Cost Range | Where to Buy |
|---|---|---|---|
| Gothic arch arbor | Steel | $80–$150 | Amazon, Home Depot |
| Farmhouse wood arbor | Cedar/pine | $120–$250 | Wayfair, local lumber |
| Modern flat-top pergola | Black metal | $150–$300 | IKEA, Costco |
| Rustic branch arch | Natural wood | $20–$60 | DIY from yard materials |
6.3 Setup Tips for Arbor Trellises
- Anchor legs at least 18 inches into the ground
- Use L-brackets or post anchors for added stability
- Train canes up and over the top, tying loosely with soft garden tape (not wire)
- Prune trailing canes so they hang no lower than 6 feet for walkway clearance
Cost estimate: $100–$300 depending on style
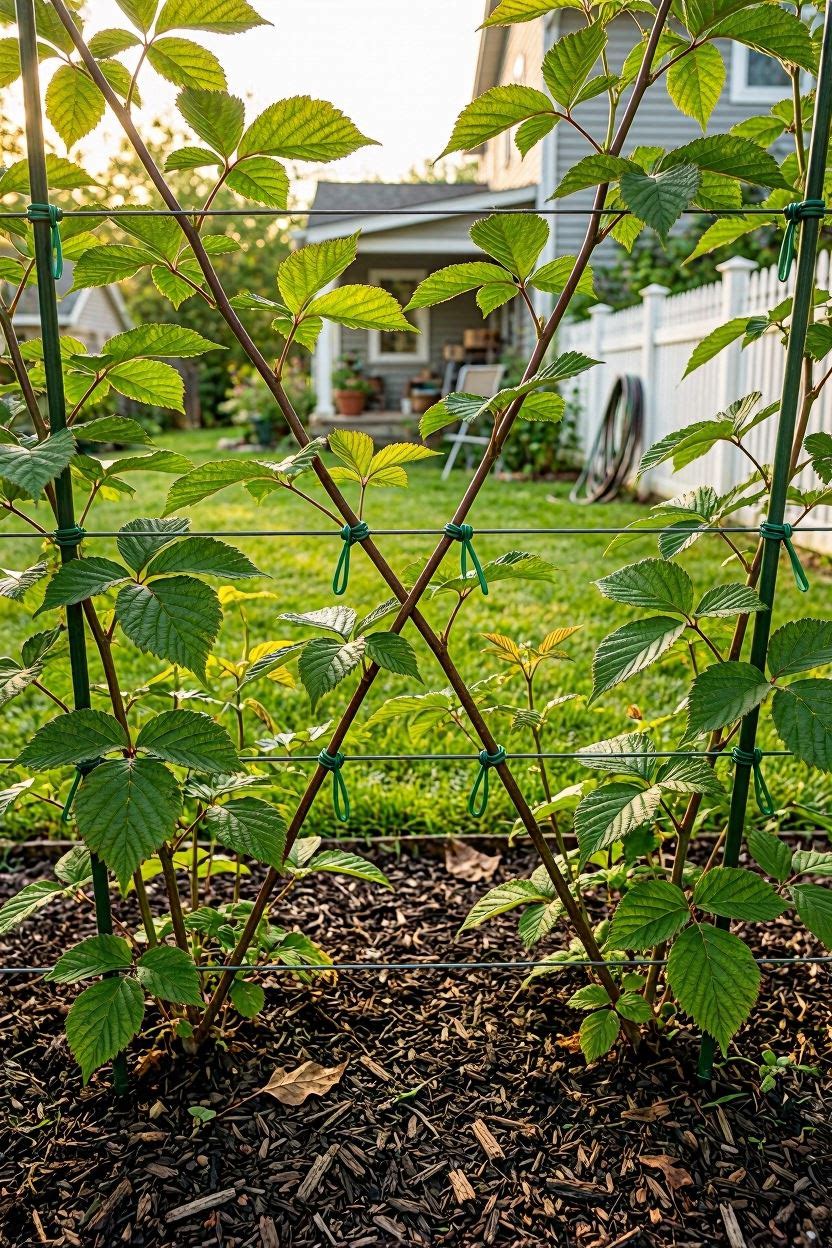
Section 7: Training Canes — The Step That Makes or Breaks Your Trellis
7.1 The Fan Training Method
This is the most popular method for home gardeners. You spread canes out in a fan shape across the trellis wires, alternating new canes and fruiting canes on different sides.
How to do it:
- In spring, tie new primocanes loosely to the center of the trellis
- After harvest, remove old floricanes (the ones that fruited)
- Spread new canes in a fan shape left and right across the wires
- Tie every 12–18 inches along the wire with soft twist ties or garden tape
7.2 The Weave Method
For thornless varieties, you can weave canes in and out of wire rows horizontally — like weaving a basket. This creates a very clean, flat surface and makes picking simple.
Section 8: Quick-Reference — Trellis Ideas by Yard Size
| Yard Size | Best Trellis Option | Why |
|---|---|---|
| Tiny (under 200 sq ft) | Fence panel or lattice | Saves space, neat appearance |
| Small suburban yard | Wood post + 2-wire system | Low cost, tidy, easy to manage |
| Medium yard with garden bed | Cattle panel or arbor | More structure, can double as decor |
| Large yard or homestead | T-post + 3-wire system | Most efficient for big plantings |
| Rental or temporary setup | PVC pipe + rope | Affordable, easy to remove |
Section 9: Common Mistakes and How to Avoid Them
9.1 Mistakes That Hurt Your Harvest
- Wires too low — Bottom wire should be at 18–24 inches minimum, or canes drag on the ground
- Posts not anchored deep enough — Go at least 2 feet deep, especially in windy areas
- Using thin wire — Blackberry canes are heavy when loaded with fruit; use 12–14 gauge minimum
- Skipping tensioners — Loose wire sags under weight and ruins the clean look you worked for
- Training too late — Train new canes while they’re still flexible (May–June), not after they harden
9.2 Wire Gauge Quick Reference
| Wire Gauge | Strength | Best Use |
|---|---|---|
| 9-gauge | Very strong | Long rows, windy areas |
| 12-gauge | Strong | Standard home rows |
| 14-gauge | Moderate | Short rows, thornless varieties |
| 16-gauge | Light | Temporary ties and training |
Section 10: Costs at a Glance
| Trellis Setup | Materials Cost | Labor (DIY) | Total Estimate |
|---|---|---|---|
| T-post + wire (20 ft row) | $60–$90 | 2–3 hours | $60–$90 |
| Wood post + wire (20 ft row) | $90–$140 | 4–5 hours | $90–$140 |
| Cattle panel flat | $40–$60 | 1–2 hours | $40–$60 |
| Cattle panel arch | $60–$90 | 2–3 hours | $60–$90 |
| Lattice panel setup | $60–$100 | 2–3 hours | $60–$100 |
| Metal arbor | $100–$250 | 2–4 hours | $100–$250 |
Final Thoughts
The best blackberry trellis is the one you’ll actually build and maintain. If you’re just starting out, go with the T-post and two-wire system — it’s cheap, fast, and it works. If you want something that looks as good as it performs, a cedar wood post trellis or a metal arbor gives you a garden feature you’ll be proud of every season.
Whatever you choose, get it in the ground before your plants start running. Blackberries grow fast, and training early canes is a hundred times easier than wrestling with hardened July growth.
Frequently Asked Questions
How far apart should trellis posts be? Space posts 15–20 feet apart for standard wire trellises. For decorative panels or cattle panels, one panel width (usually 16 feet) per section.
What height should a blackberry trellis be? Minimum 5 feet, ideally 6 feet. Most varieties send canes 6–10 feet long, and you want to keep them off the ground while leaving room for growth.
Can I use a chain-link fence as a trellis? Yes — chain link works well for thornless varieties. Weave canes through the links or tie them with soft ties. Avoid with thorned types as removal becomes painful.
Do I need to remove and retrain canes every year? Yes. Blackberries fruit on second-year canes (floricanes). After harvest, cut those out completely and retrain the new first-year canes (primocanes) onto the trellis for next year’s crop.
What’s the easiest trellis for a beginner? A cattle panel secured to two T-posts. No wire to tension, no complex steps — just secure and train.