10 Stunning Ceiling Design Ideas to Transform Any Room in Your Home
Introduction
Most people spend a lot of time decorating their walls and floors but completely forget about the ceiling. The ceiling is the largest surface in any room — and it’s the one place where you can make a huge impact without moving a single piece of furniture.
Whether you live in a small apartment or a spacious home, a well-designed ceiling can make the room feel taller, cozier, or more luxurious. The best part? Many of these ideas are beginner-friendly and won’t break the bank.
Here are 10 ceiling design ideas that actually work — with real steps, costs, and product recommendations for US homeowners.
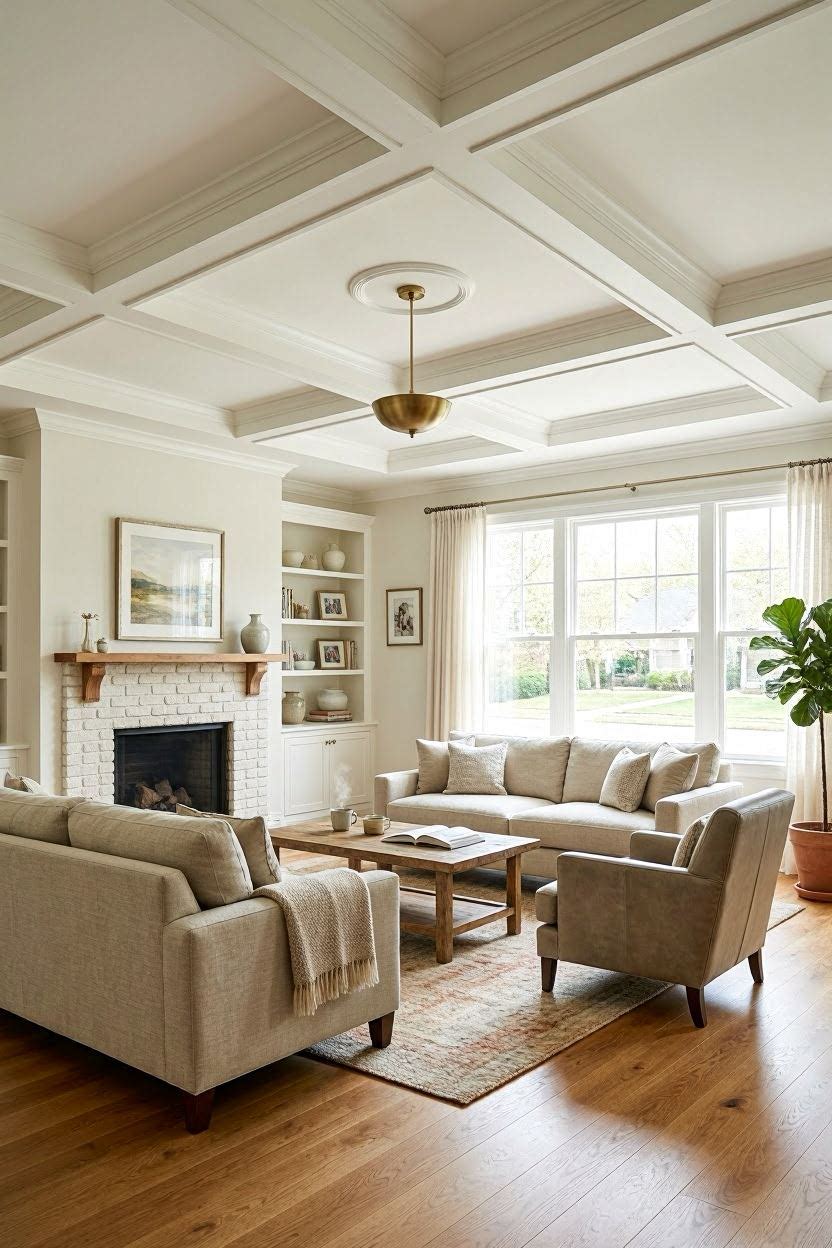
1. Coffered Ceiling — Classic and Elegant
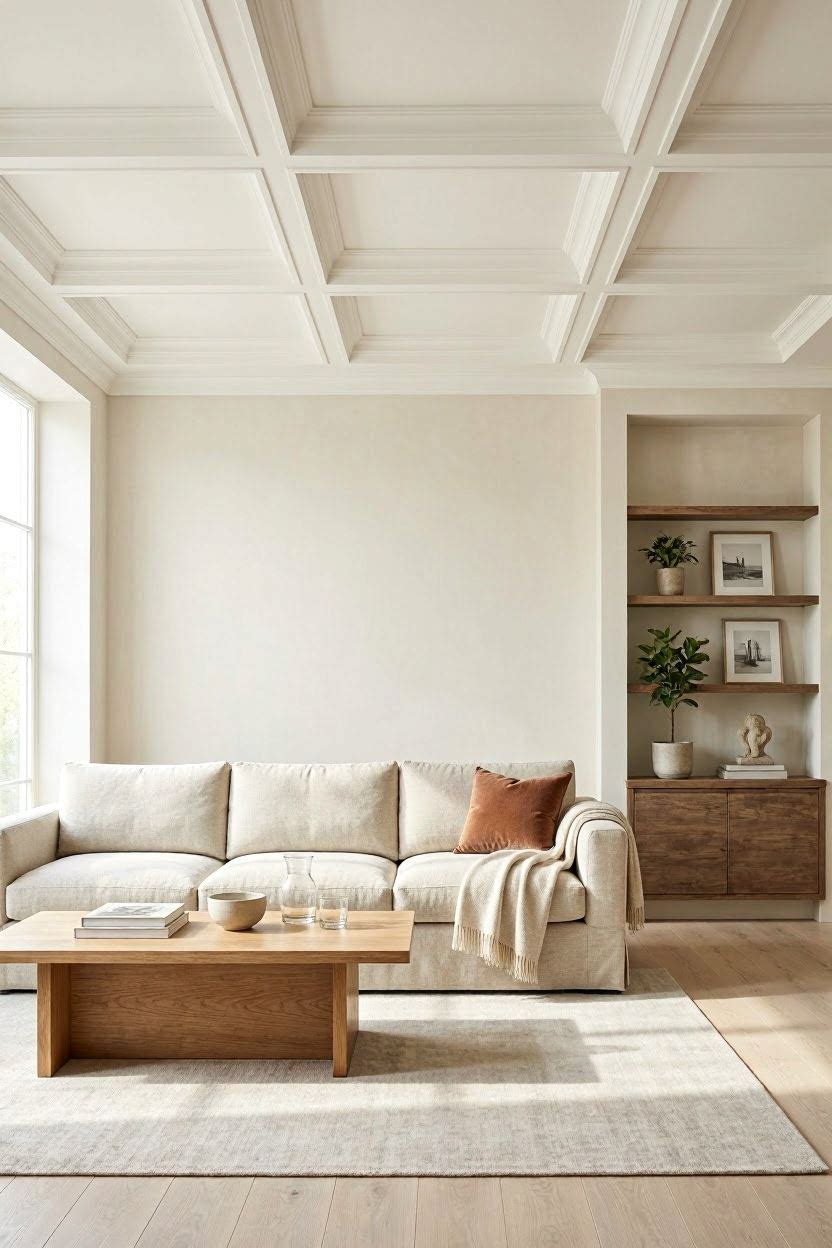
A coffered ceiling uses a grid of recessed panels (called coffers) to add depth and a high-end architectural look to any room. It’s a popular choice for living rooms, dining rooms, and home offices.
How to Do It — Step by Step
- Measure your ceiling and plan a grid pattern using painter’s tape on the floor for reference.
- Buy MDF or polyurethane coffer kits — available at Home Depot or Lowe’s. Pre-made kits cost around $150–$400 depending on room size.
- Install the beams using construction adhesive and finishing nails. Follow the manufacturer’s guide.
- Fill gaps and nail holes with paintable caulk.
- Paint everything the same color as the ceiling for a seamless look — or use a contrasting color for drama.
Cost Estimate
| Item | Estimated Cost |
|---|---|
| MDF coffer kit (medium room) | $200–$350 |
| Paint (1–2 gallons) | $30–$60 |
| Caulk + tools | $20–$40 |
| Total (DIY) | $250–$450 |
Pro Tip: Use white or off-white paint if you want the room to feel larger and brighter.
2. Shiplap Ceiling — Rustic and Trendy
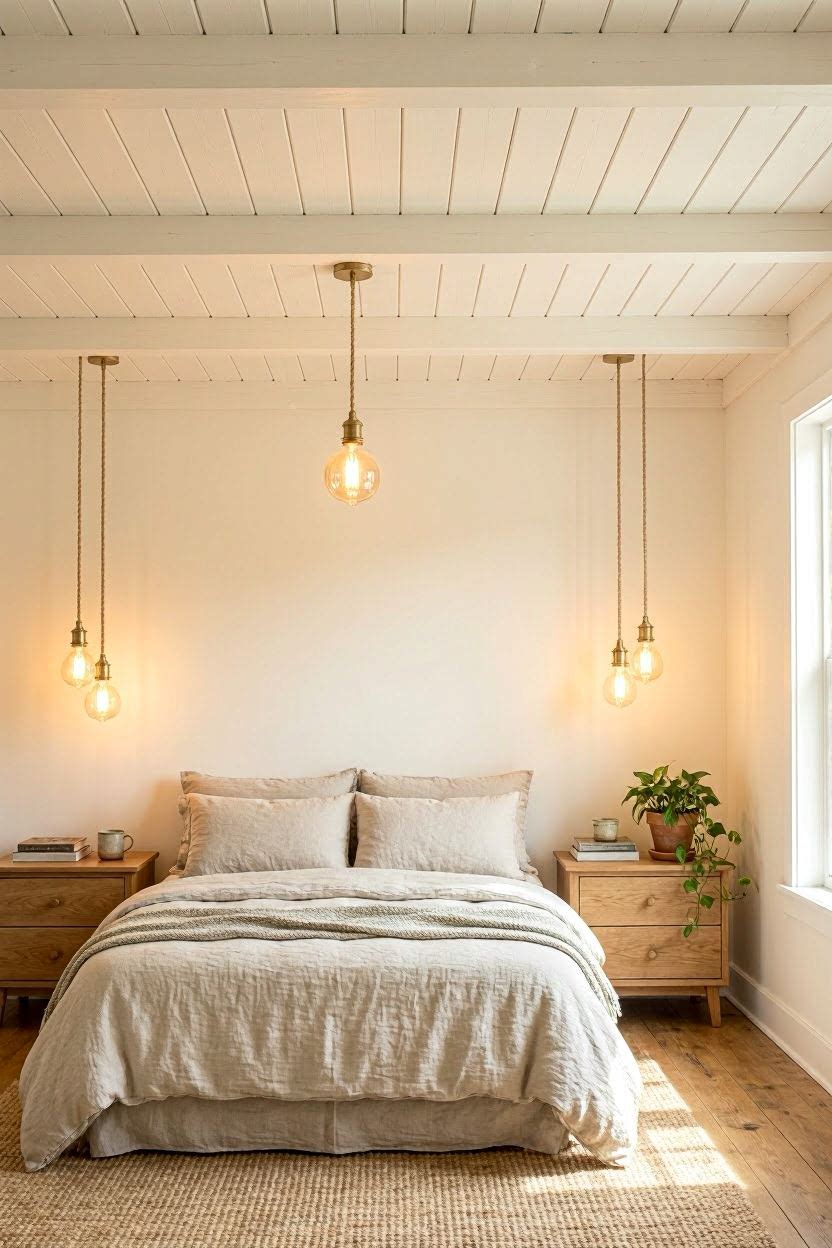
Shiplap is a type of wooden board with a small groove between each plank. Originally used in barns and boats, it became a major interior trend (thanks to Joanna Gaines and Fixer Upper). On the ceiling, shiplap adds warmth, texture, and that cozy farmhouse feel.
How to Do It — Step by Step
- Find your ceiling joists using a stud finder. Mark them with pencil.
- Buy shiplap boards — real wood or PVC. PVC is lighter and easier for beginners. Available at Home Depot. Budget around $1.50–$3.50 per sq ft.
- Cut boards to length with a miter saw.
- Nail each board to the joists using a nail gun. Leave a small gap (use a nickel as a spacer) between boards.
- Prime and paint — white is most popular, but natural stain also looks beautiful.
Where to Buy: Home Depot, Lowe’s, or online at BuildWithBMC.com.
3. Tray Ceiling — Adds Height and Sophistication
A tray ceiling (also called a recessed ceiling) has a raised center section that looks like an upside-down tray. It’s built into the ceiling structure, but you can fake it using molding and paint tricks.
How to Do It — Step by Step
- For new construction: Work with your builder to frame a tray ceiling during construction.
- For existing ceilings (faux tray):
- Apply crown molding in a rectangle shape on the ceiling.
- Paint the recessed center area a different color (usually darker or a bold accent).
- Add LED strip lights along the inside edge for a glowing effect.
- Crown molding can be found at Home Depot for $1–$3 per linear foot.
Best Colors for Tray Ceilings
| Ceiling Color | Wall Color | Vibe |
|---|---|---|
| Deep Navy | White walls | Bold & Luxurious |
| Soft Gold | Cream walls | Warm & Elegant |
| Same as wall | White trim | Seamless & Modern |
| Sky Blue | White walls | Airy & Fresh |
4. Beadboard Ceiling — Cottage Charm
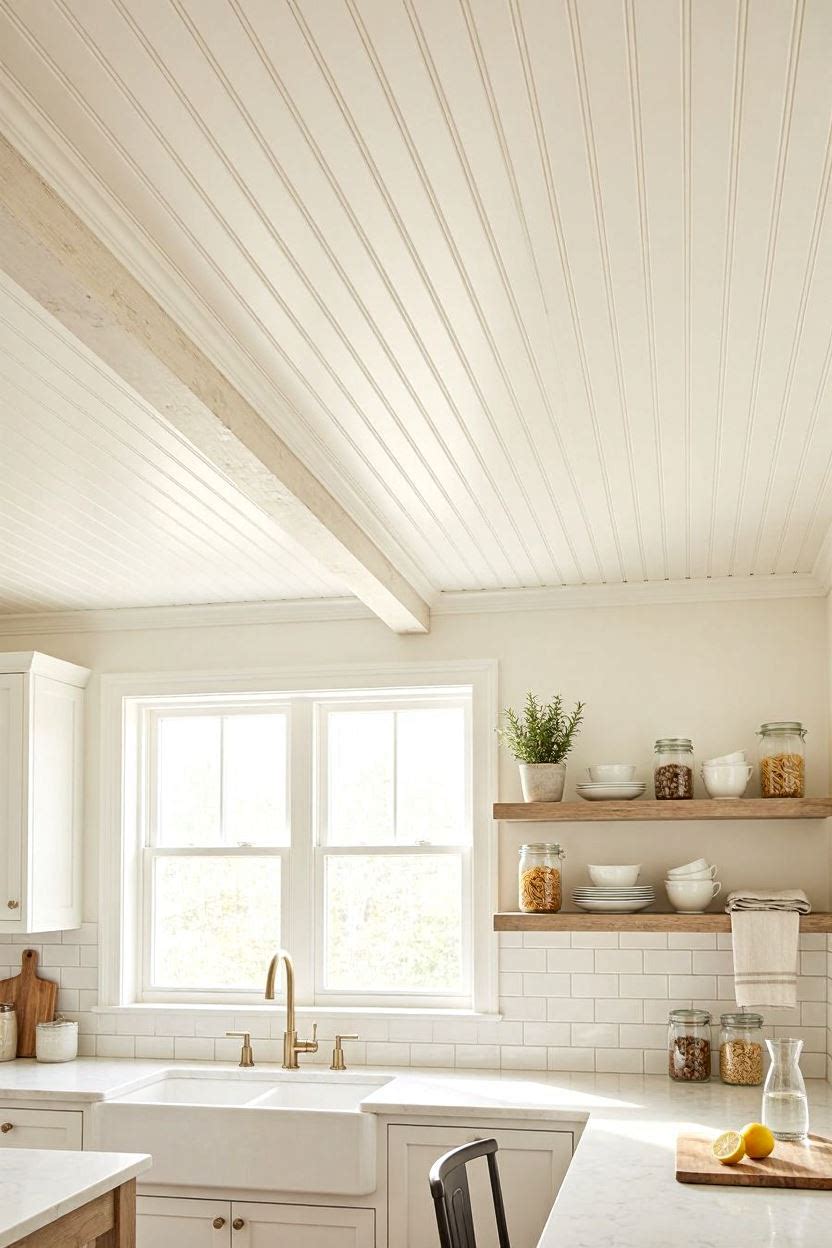
Beadboard is a classic paneling style with narrow vertical grooves. When used on the ceiling, it instantly adds a cottage, coastal, or Southern farmhouse feel. It works beautifully in kitchens, porches, bathrooms, and sunrooms.
How to Do It — Step by Step
- Buy beadboard panels — 4×8 ft sheets cost around $20–$35 each at Lowe’s.
- Cut panels to fit your ceiling dimensions.
- Glue and nail the panels to the ceiling — use panel adhesive and a brad nailer.
- Add trim strips at the seams and edges to hide gaps.
- Paint with semi-gloss white for a clean, bright finish that’s easy to clean.
Best for: Porches, bathrooms, kitchens, laundry rooms.
5. Exposed Beam Ceiling — Bold and Architectural
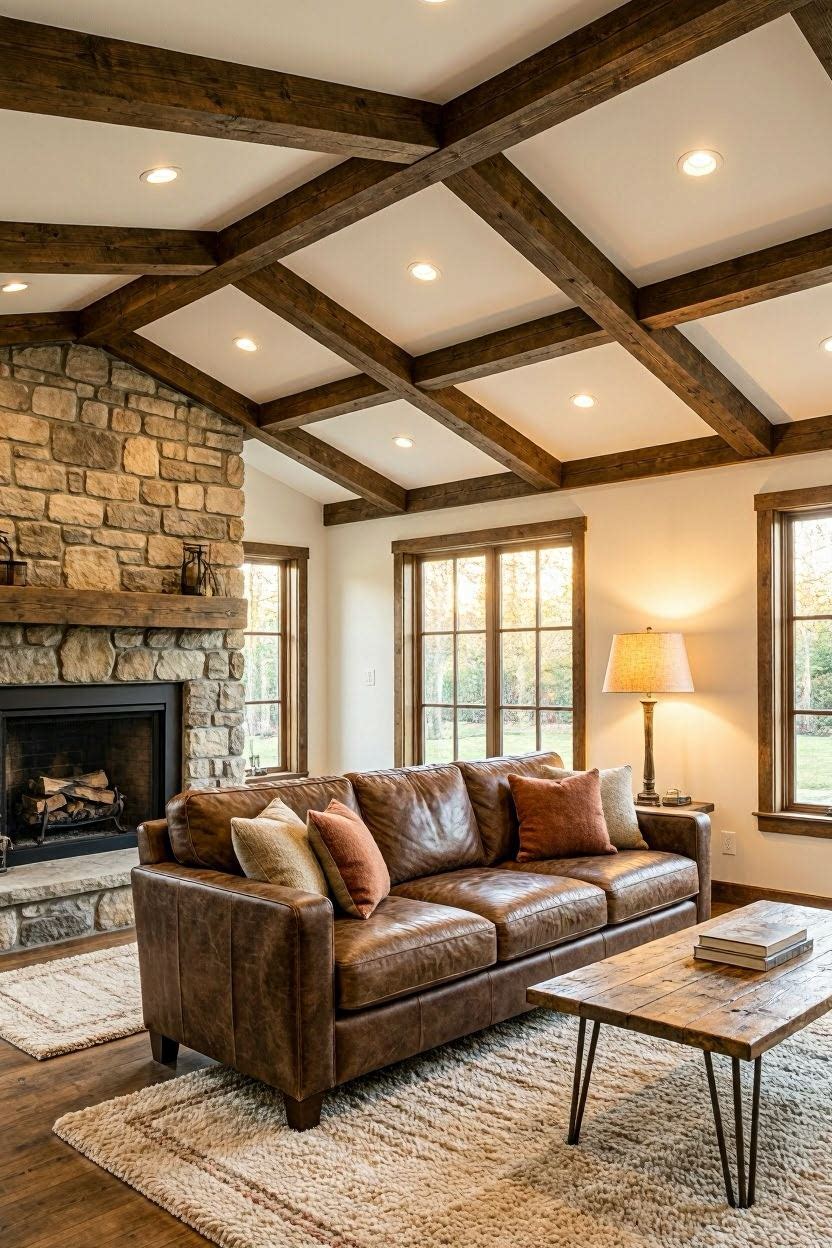
Exposed wood beams are one of the most dramatic ceiling upgrades you can make. They add warmth, texture, and a sense of craftsmanship. The great news — you don’t need real structural beams. Faux wood beams are lightweight, affordable, and look just as good.
How to Do It — Step by Step
- Choose faux wood beams — brands like Barron Designs or Fauxwood Beams offer realistic options from $50–$200 per beam.
- Mark beam positions on the ceiling — typically every 4–6 feet apart, running lengthwise.
- Install a mounting board (2×4 or 2×6 lumber) along each beam line, screwed into joists.
- Slide the hollow faux beam over the mounting board and secure with screws.
- Stain or paint to match your room’s wood tones.
Faux Beam Comparison
| Brand | Style | Price Range | Where to Buy |
|---|---|---|---|
| Barron Designs | Rustic, hand-hewn | $60–$180/beam | barrondesigns.com |
| Fauxwood Beams | Smooth or rough | $50–$200/beam | fauxwoodbeams.com |
| Home Depot DIY | Basic look | $30–$80/beam | homedepot.com |
6. Tin Ceiling Tiles — Vintage and Decorative
Tin ceiling tiles were popular in the late 1800s and early 1900s in American homes and storefronts. Today, they’re making a huge comeback. You can find them in embossed metal or lightweight PVC versions that snap together like puzzle pieces.
How to Do It — Step by Step
- Choose your tile style — PVC tiles are the easiest for DIY. A 2×2 ft tile costs $3–$8 at American Tin Ceilings or Home Depot.
- Measure and plan your ceiling grid so tiles fit symmetrically.
- Install using adhesive or a grid system — PVC tiles can simply be glued up.
- Paint with metallic paint (gold, silver, or oil-rubbed bronze) for an authentic look, or keep white for a clean modern feel.
Best for: Kitchens, dining rooms, bars, and vintage-style spaces.
7. Wallpaper on the Ceiling — Unexpected and Beautiful
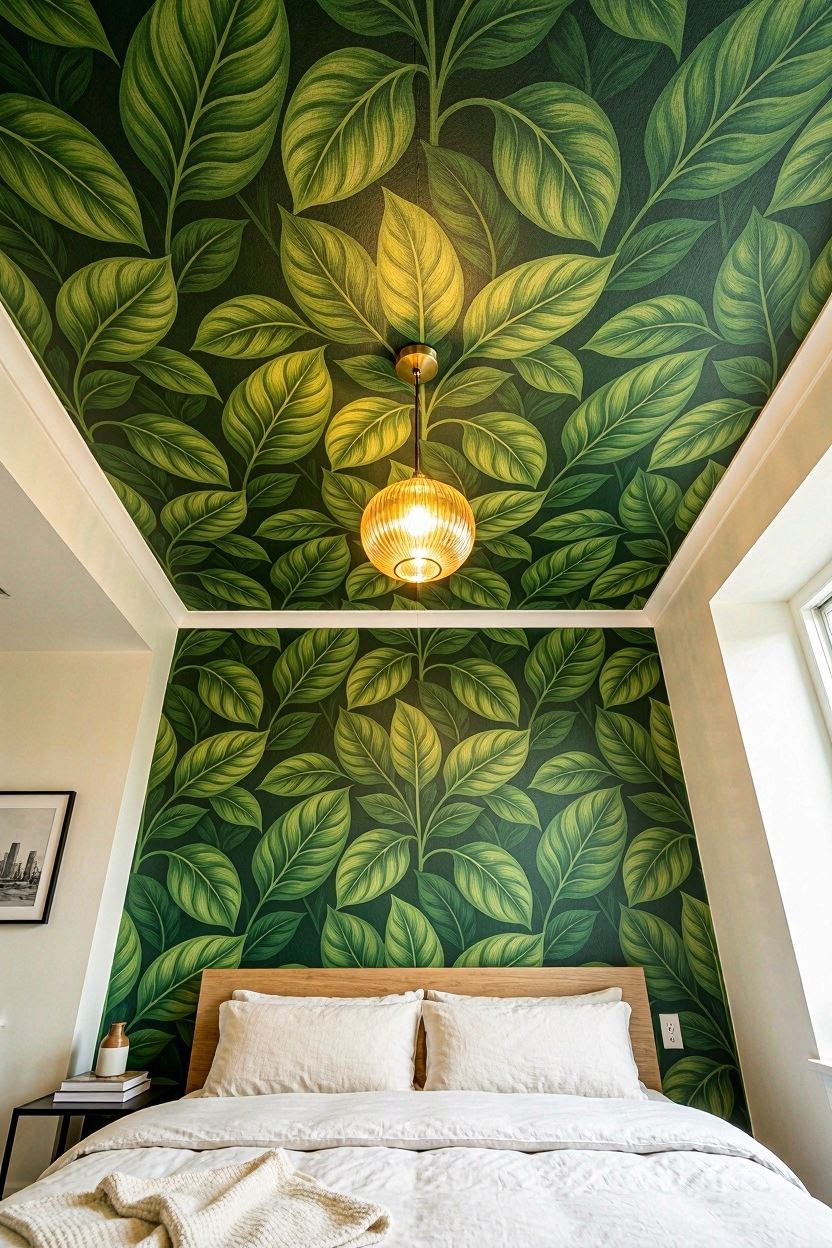
Putting wallpaper on the ceiling is one of the most underrated design moves. It instantly adds color, pattern, and personality — and it’s completely removable if you use peel-and-stick wallpaper. This works especially well in bedrooms, dining rooms, and powder rooms.
How to Do It — Step by Step
- Choose a pattern — florals, botanicals, and geometric prints work well overhead. Avoid very small prints that are hard to see from below.
- Buy peel-and-stick wallpaper — brands like Tempaper, NuWallpaper, or RoomMates sell rolls for $30–$70 each. Available at Target, Wayfair, or Amazon.
- Clean and prime the ceiling surface.
- Start from the center of the ceiling and work outward to keep the pattern centered.
- Use a wallpaper smoothing tool to remove air bubbles as you go.
Pro Tip: Use a stepladder and get a second person to help hold the paper steady while you apply it.
8. Painted Ceiling — The Easiest Upgrade
Most people just paint their ceiling white and forget about it. But a painted ceiling — in a bold, moody, or unexpected color — can completely transform a room without any construction work.
Step-by-Step
- Pick a ceiling color — try navy, forest green, terracotta, blush, or even black for a dramatic effect.
- Use ceiling-specific paint — it’s thicker and less prone to dripping. Sherwin-Williams and Benjamin Moore both make excellent ceiling paints around $40–$60 per gallon.
- Tape off walls and trim with painter’s tape.
- Use a roller with an extension pole — start with the edges using a brush, then roll the main area.
- Apply 2 coats for full coverage. Let dry completely between coats.
Color Mood Guide
| Ceiling Color | Room Effect |
|---|---|
| Deep Navy | Intimate, sky-like at night |
| Sage Green | Calm, earthy, organic |
| Warm Terracotta | Cozy, Mediterranean feel |
| Blush Pink | Soft, romantic |
| Matte Black | Dramatic, modern |
| Powder Blue | Fresh, airy, Southern cottage |
9. Stretch Ceiling — Modern and Sleek
A stretch ceiling is a thin PVC or fabric membrane stretched across a frame attached to your existing ceiling. It creates an incredibly smooth, seamless surface — and can even be backlit with LED lights for a glowing effect. This is popular in modern homes, home theaters, and luxury apartments.
What You Need to Know
- Not a DIY project — stretch ceilings need professional installation.
- Cost: Typically $5–$15 per sq ft installed, depending on finish and lighting.
- Finishes available: Matte, satin, gloss, metallic, printed patterns, and translucent (for backlighting).
- Find contractors at Armstrong Ceilings, USG, or local drywall contractors who offer this service.
Stretch Ceiling Options
| Finish | Look | Best For |
|---|---|---|
| Matte white | Clean, modern | Living rooms, bedrooms |
| High gloss | Reflective, luxurious | Dining rooms, lobbies |
| Translucent + LED | Glowing, dramatic | Home theaters, gyms |
| Printed graphic | Bold, artistic | Kids’ rooms, creative spaces |
10. Stenciled Ceiling — Artistic and Affordable
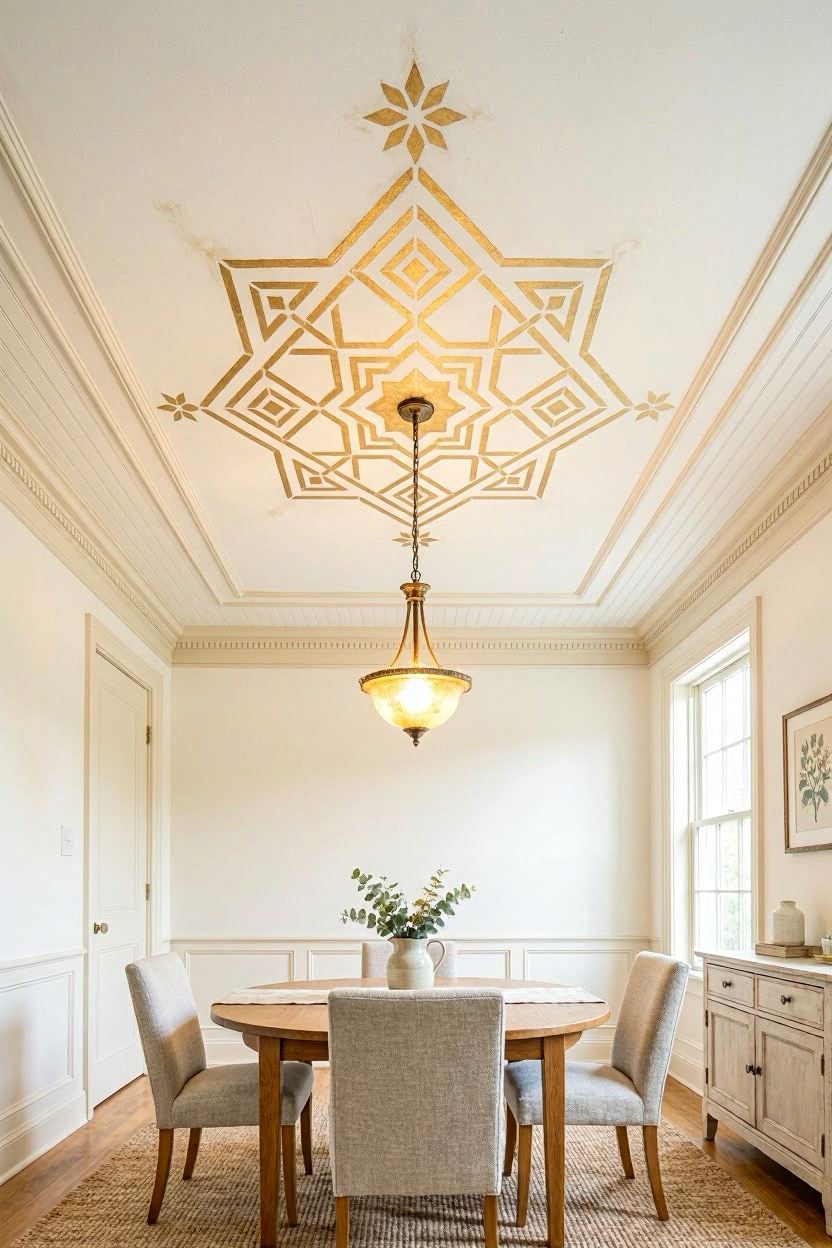
A stenciled ceiling lets you add the look of expensive hand-painted art for a fraction of the cost. You can create medallions, geometric patterns, damask prints, or Moroccan-inspired designs using a simple stencil and a foam roller.
How to Do It — Step by Step
- Buy a ceiling stencil — brands like Royal Design Studio or Cutting Edge Stencils sell large-format stencils for $25–$60. Available on their websites or Amazon.
- Paint the base ceiling color and let dry completely.
- Find and mark the center of the ceiling — this is where your pattern should be centered.
- Tape the stencil to the ceiling in your starting position.
- Use a dense foam roller lightly loaded with paint — roll gently to avoid bleeding under the stencil edges.
- Reposition the stencil and repeat the pattern across the ceiling.
- Touch up edges with a small brush if needed.
Best paint: Use chalk paint or flat latex — they give the crispest stencil edges.
Quick Comparison: All 10 Ceiling Ideas
| Ceiling Design | Difficulty | Avg. Cost (DIY) | Best Room |
|---|---|---|---|
| Coffered | Moderate | $250–$450 | Living room, dining room |
| Shiplap | Easy–Moderate | $150–$400 | Bedroom, living room |
| Tray (faux) | Easy | $100–$300 | Bedroom, dining room |
| Beadboard | Easy | $80–$200 | Kitchen, bathroom, porch |
| Exposed Beams (faux) | Easy–Moderate | $200–$600 | Living room, kitchen |
| Tin Tiles | Easy | $100–$300 | Kitchen, dining, bar |
| Wallpaper | Easy | $60–$200 | Bedroom, powder room |
| Painted | Very Easy | $40–$120 | Any room |
| Stretch Ceiling | Professional | $800–$2,500+ | Theater, modern spaces |
| Stenciled | Easy | $50–$150 | Bedroom, dining room |
FAQ
Q: What is the cheapest ceiling upgrade? A painting the ceiling in a bold or unexpected color is the easiest and most affordable option — you can do it for under $100.
Q: Can I install shiplap or beadboard on my ceiling myself? A: Yes — both are beginner-friendly if you have basic tools like a nail gun, miter saw, and stud finder. Plan for a weekend project.
Q: Do I need to hire a professional for any of these? A: Stretch ceilings always require professional installation. Coffered ceilings and exposed beams are DIY-friendly with faux kits, but hiring a carpenter will give cleaner results.
Q: Will a dark ceiling make my room feel smaller? A: Not necessarily. A dark ceiling can actually feel dramatic and cozy rather than cramped — especially in rooms with high ceilings or good lighting.
Q: What rooms benefit most from ceiling upgrades? A: Living rooms, dining rooms, and master bedrooms get the most impact from ceiling upgrades because they’re the spaces you spend the most time in.
Final Thoughts
Your ceiling is not just structural — it’s a design opportunity. Whether you want the timeless elegance of a coffered ceiling, the cozy warmth of shiplap, or something as simple as a bold painted color, there’s an option here for every budget, skill level, and style.
Start with the room where you spend the most time, pick one idea, and commit to it. Even a single change — like painting the ceiling navy in your dining room or adding peel-and-stick wallpaper overhead in your bedroom — can completely change how the space feels.
The fifth wall is waiting. Make it count.