15 Easy Pumpkin Trellis Ideas for Beginners (That Actually Work in Small Yards)
Why Grow Pumpkins on a Trellis?
Most beginners assume pumpkins need a huge patch of open ground. The truth? Pumpkins are natural climbers — and growing them vertically on a trellis can actually make your garden life much easier.
Here’s what you gain when you go vertical:
- More space — Your pumpkin vines grow up instead of sprawling sideways, freeing up room for other vegetables.
- Healthier plants — Better airflow around the leaves means less mold and fewer pest problems.
- Easier harvesting — You can see your pumpkins clearly instead of hunting through a jungle of vines.
- Better-looking garden — A well-built trellis turns your vegetable patch into a beautiful garden feature.
If you have a small backyard, a fence line, or even just a sunny patio, you can absolutely grow pumpkins on a trellis. This guide walks you through everything — from choosing the right pumpkin variety to building your first support structure.
Section 1: Choose the Right Pumpkin Variety First
This is the step most beginners skip — and it’s the most important one. Not all pumpkins are good candidates for trellis growing.
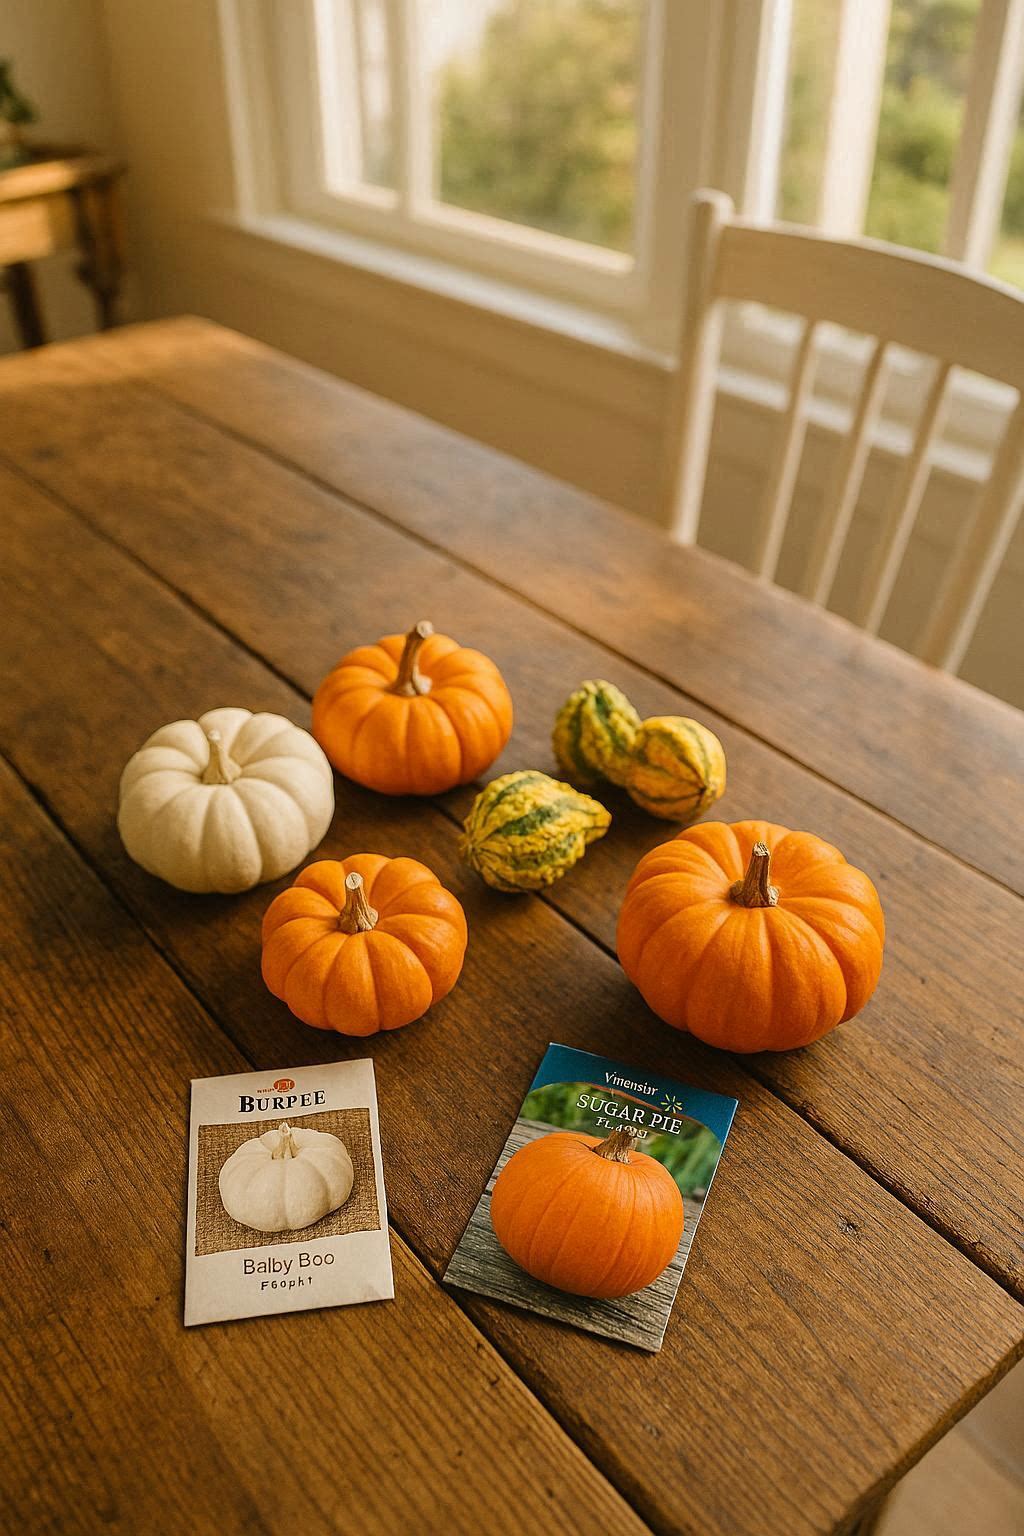
1.1 Best Pumpkin Varieties for Trellises
Small and medium varieties work best for vertical growing. Large pumpkins (think 20+ pounds) are too heavy for most trellis structures unless you build something very heavy-duty.
| Variety | Avg. Weight | Trellis Friendly? | Where to Buy |
|---|---|---|---|
| Baby Boo | 0.5 – 1 lb | ✅ Excellent | Burpee, Home Depot |
| Jack Be Little | 0.5 – 1 lb | ✅ Excellent | Walmart, Amazon |
| Sugar Pie | 6 – 8 lbs | ✅ Good | Lowe’s, True Leaf Market |
| Long Island Cheese | 8 – 10 lbs | ⚠️ Needs sling support | Territorial Seed |
| Connecticut Field | 15 – 25 lbs | ❌ Too heavy | — |
| Atlantic Giant | 100+ lbs | ❌ Ground only | — |
💡 Beginner Tip: Start with Baby Boo or Jack Be Little. They’re lightweight, grow fast, and look adorable hanging from a trellis. You’ll find seeds at most garden centers for $2–$5 a packet.
Section 2: Pick Your Trellis Type
Now for the fun part. There are several trellis styles that work beautifully for pumpkins, and each one suits a different garden setup. Let’s look at the most beginner-friendly options.
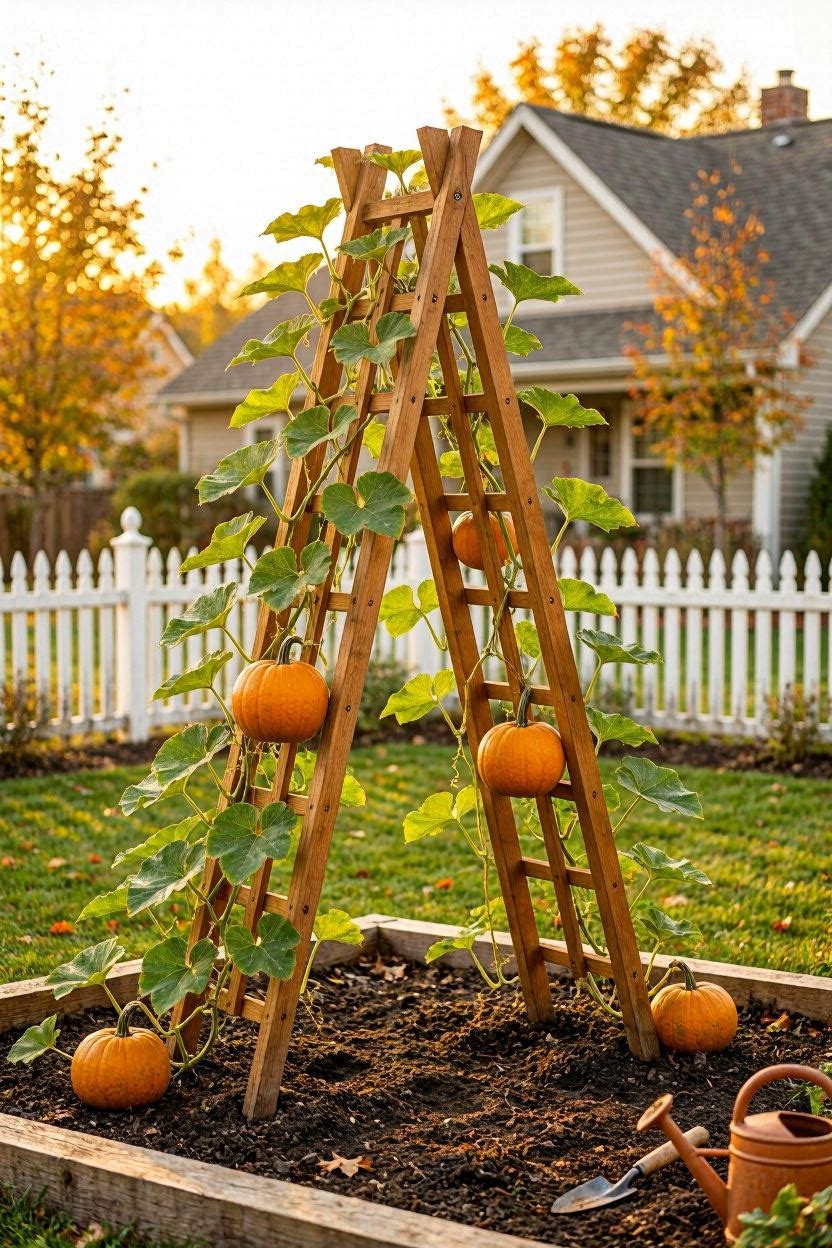
2.1 The A-Frame Trellis
An A-frame trellis is shaped like the letter A — two panels leaned against each other and joined at the top. It’s freestanding, which means you don’t need a fence or wall to attach it to.
Best for: Raised beds, open garden patches, renters who can’t drill into walls
Cost to build: $15 – $40 (DIY with lumber and wire mesh)
Difficulty: ⭐⭐ Easy
You can buy a pre-made A-frame trellis at Amazon or Gardener’s Supply Company for around $35–$60, or build one yourself with two 6-foot wooden boards, a hinge at the top, and some hardware cloth or chicken wire stretched between them.
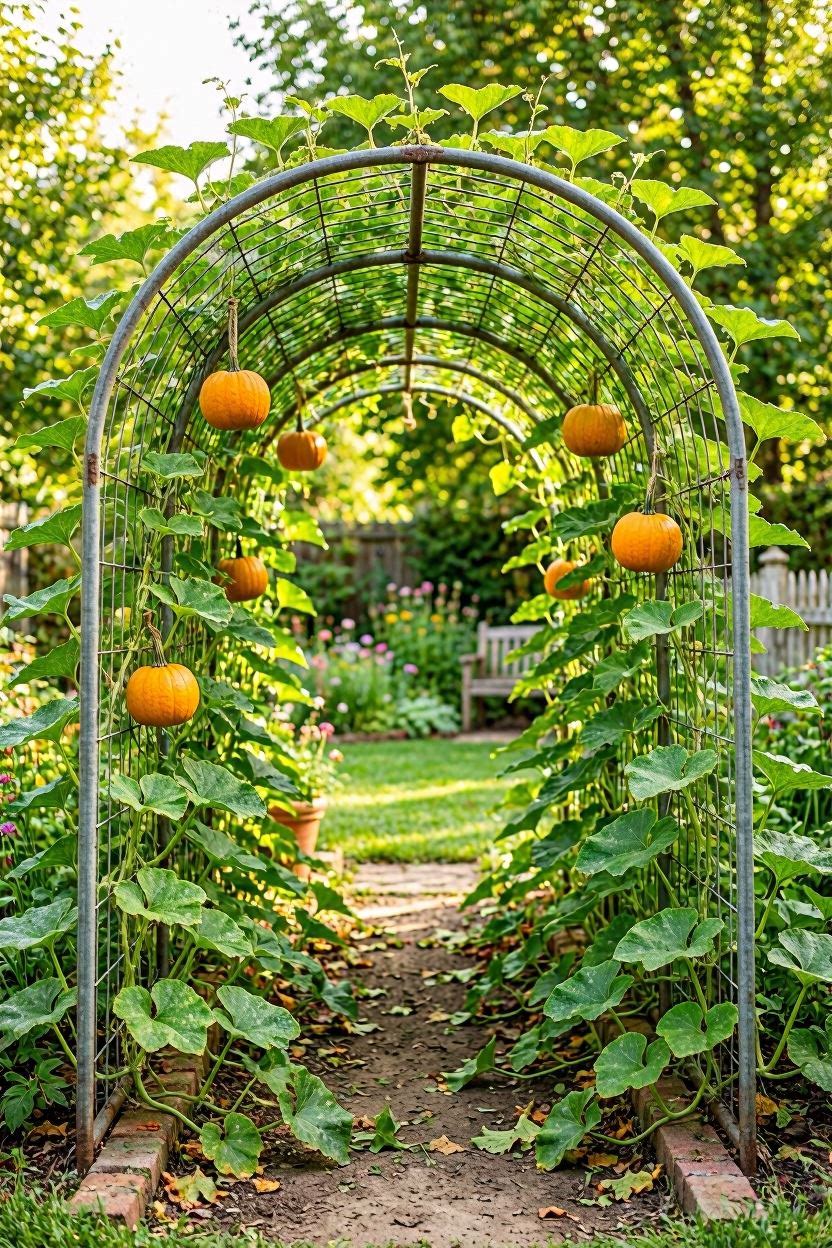
2.2 The Cattle Panel Arch Trellis
A cattle panel is a rigid wire grid sold at farm supply stores like Tractor Supply Co. ($30–$50 per panel). When you bend it into an arch shape and anchor both ends in the ground, you get a beautiful tunnel that pumpkins love to climb.
Best for: Garden paths, large open yards, dramatic visual impact
Cost to build: $30 – $60
Difficulty: ⭐⭐⭐ Moderate (you need two people to bend the panel)
The tunnel it creates is one of the most stunning sights in a home garden — especially when little pumpkins start hanging down inside it.
2.3 The Fence Trellis (Zero Extra Cost)
If you already have a wood or chain-link fence in your backyard, congratulations — you already own a pumpkin trellis. Just plant your seeds 6 inches away from the fence base and let the vines find their way up.
Best for: Anyone with an existing fence
Cost: $0 (or a few dollars for zip ties to guide the vines)
Difficulty: ⭐ Super Easy
This is the #1 recommended starting point for absolute beginners. No building, no buying — just planting.
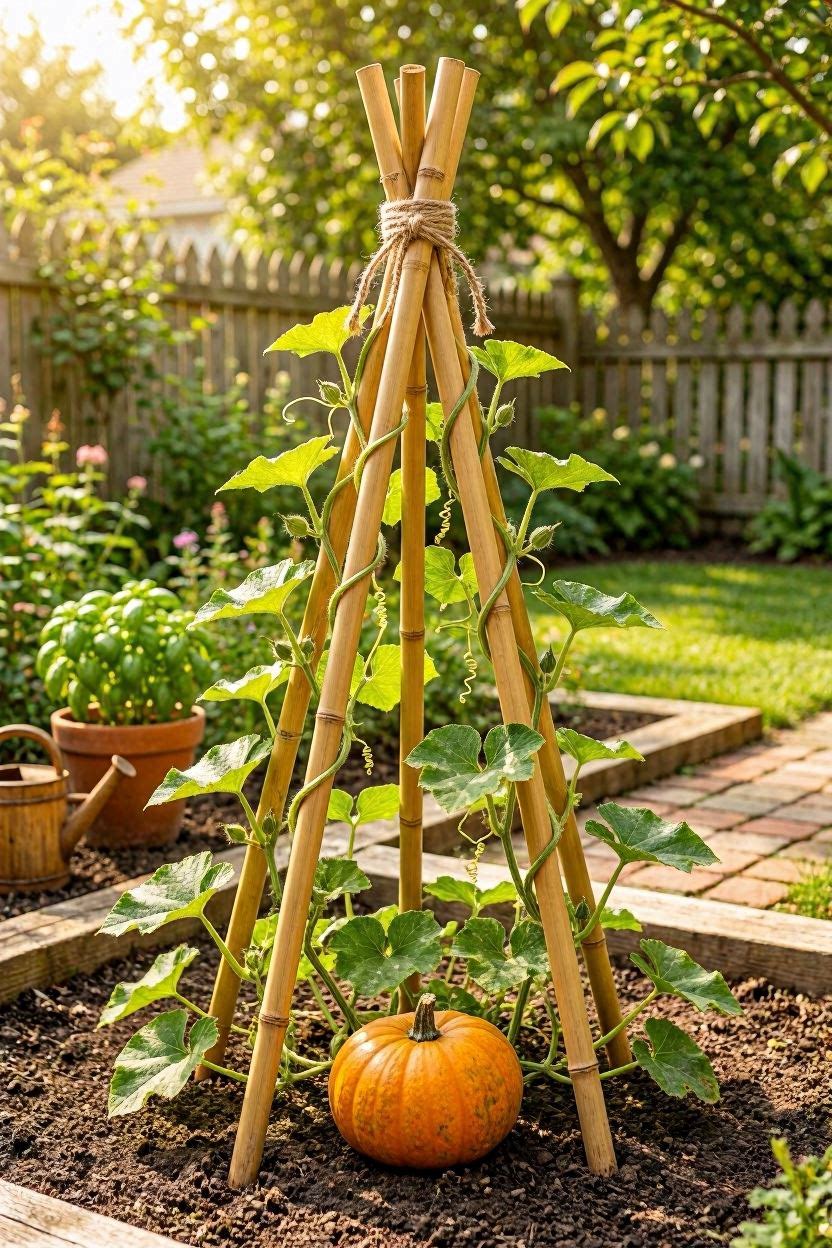
2.4 The Bamboo Teepee Trellis
Three or four tall bamboo poles (available at Home Depot for about $10–$15 for a pack of 10) tied together at the top form a teepee shape. It’s lightweight, easy to assemble, and looks beautiful in a garden.
Best for: Container gardens, patios, small decorative setups
Cost: $10 – $20
Difficulty: ⭐ Very Easy
2.5 The PVC Pipe Trellis
PVC pipe is cheap, weatherproof, and easy to cut. A basic PVC trellis frame costs about $15–$25 to build and can last for years. You string twine or jute rope between the pipes to create a grid the vines can grip.
Best for: Renters, budget gardeners, anyone wanting a lightweight structure
Cost: $15 – $25
Difficulty: ⭐⭐ Easy
Section 3: Materials You’ll Need (Quick Reference)
Here’s a simple table to help you compare the most common trellis-building materials:
| Material | Cost | Durability | Best Use | Buy At |
|---|---|---|---|---|
| Wooden lumber (2×4) | $5–$15/board | 5–10 years | A-frame, flat panel | Home Depot, Lowe’s |
| Cattle panel (16 ft) | $30–$50 | 20+ years | Arch trellis | Tractor Supply Co. |
| Bamboo poles (4 ft) | $10–$15/pack | 2–3 years | Teepee trellis | Home Depot, Amazon |
| PVC pipe (10 ft) | $3–$6/pipe | 5–10 years | Lightweight frame | Home Depot |
| Hardware cloth (mesh) | $15–$30/roll | 10+ years | Panel filler | Amazon, Ace Hardware |
| Jute/twine | $5–$10 | 1 season | String trellis | Any garden store |
| Zip ties | $5–$8/pack | 2–3 years | Attaching vines | Amazon, Dollar Tree |
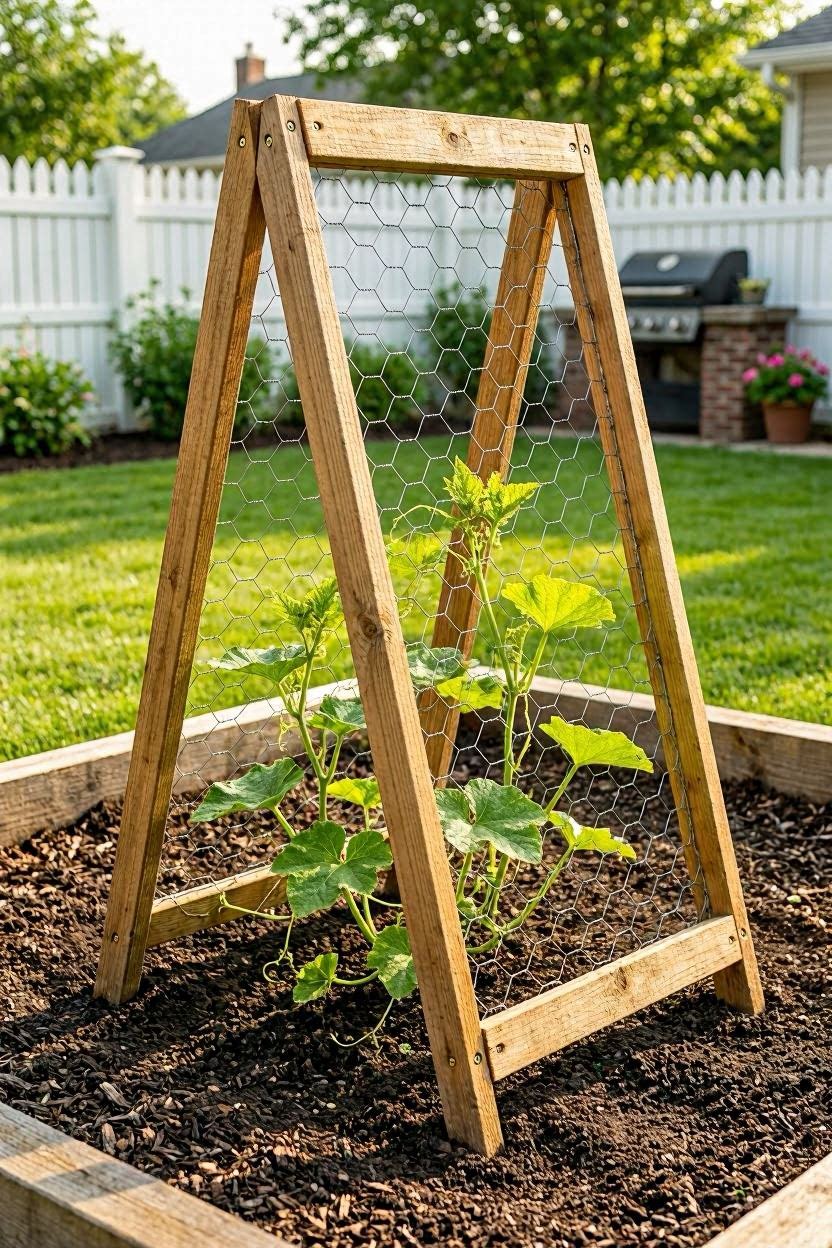
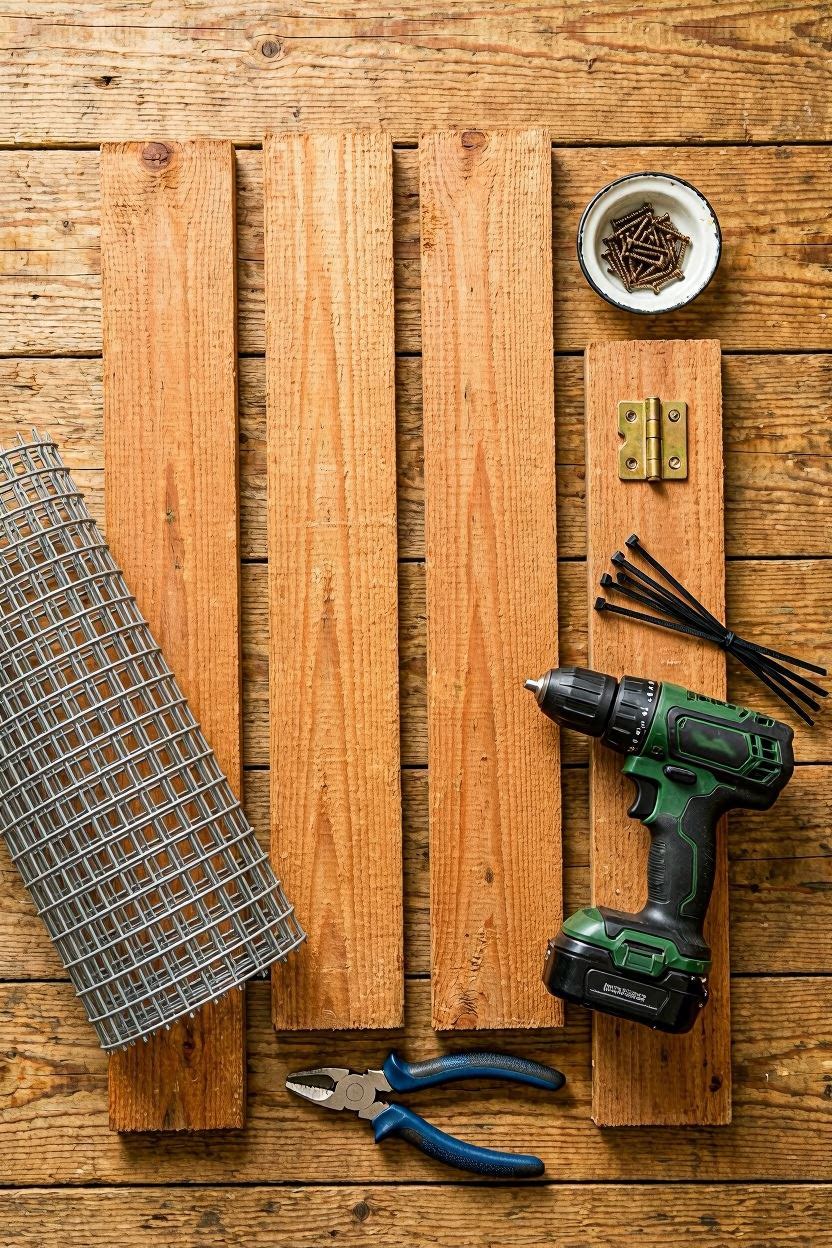
Section 4: How to Build a Simple A-Frame Trellis (Step-by-Step)
This is the best first trellis project for beginners. Here’s exactly how to build one in about 90 minutes.
What You’ll Need:
- 4 wooden boards (1×3 inch, 6 feet long) — about $3–$5 each at Home Depot
- 1 door hinge + screws
- Hardware cloth or chicken wire (a 2×3 ft piece)
- Wire cutters
- Drill
- Staple gun or zip ties
Step 4.1 — Build the Two Side Panels
Take two boards and lay them flat. Cut your hardware cloth to fit the frame, then staple it tightly to the boards. Repeat for the second panel. This is your climbing surface.
Step 4.2 — Attach the Panels Together
Connect your two panels at the top using the door hinge. This lets you open and close the A-frame like a book, which is useful for storage in winter.
Step 4.3 — Set It Up in the Garden
Open the A-frame to about a 45-degree angle and press the legs 4–6 inches into the soil. Add a wooden crossbar at the bottom (connect the two base legs with a stick or rope) so it doesn’t slip open.
Step 4.4 — Plant Your Seeds
Sow 2–3 pumpkin seeds 1 inch deep at the base of each panel side. Once seedlings reach 3–4 inches tall, thin to the strongest one per side. Water deeply every 2–3 days.
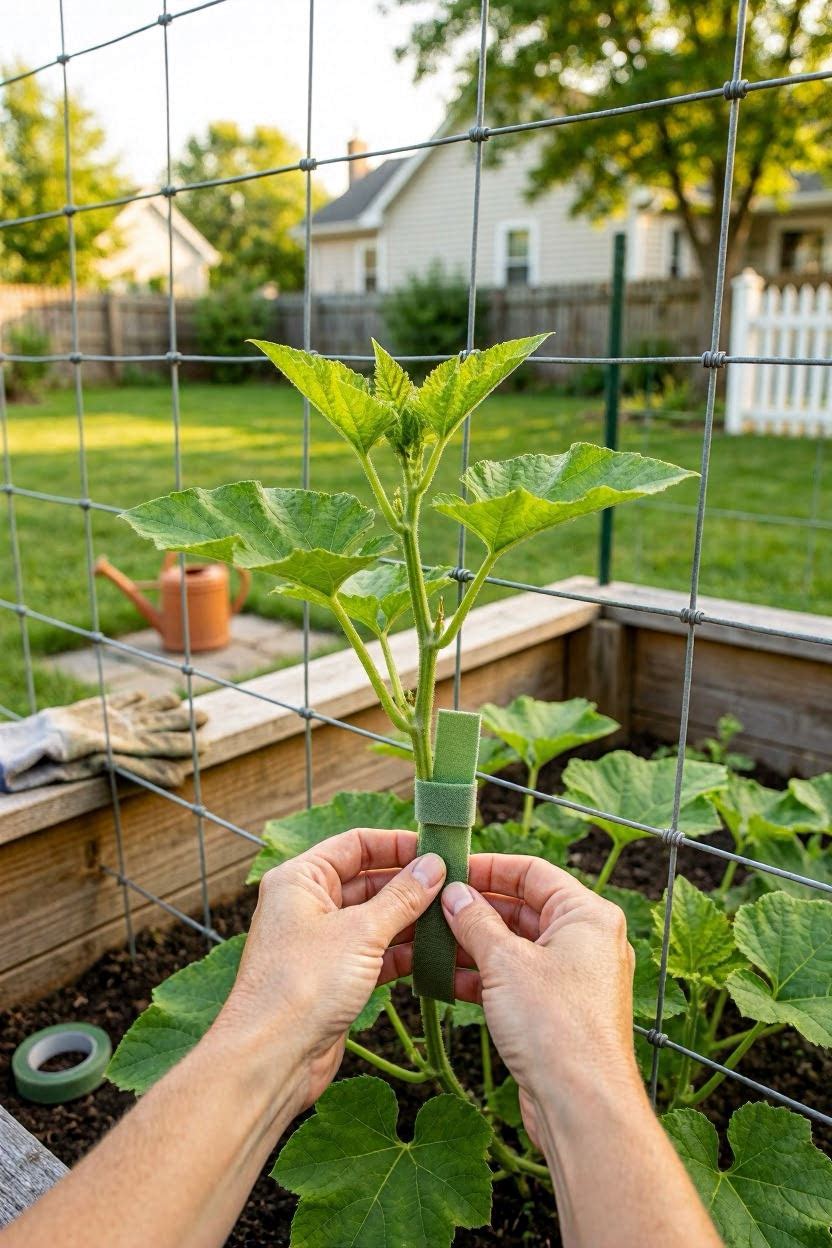
Step 4.5 — Guide the Vines as They Grow
Once your vines start growing, gently weave them through the mesh as they climb. You can use soft cloth strips or garden velcro (sold at Amazon for ~$8) to loosely tie unruly vines to the structure.
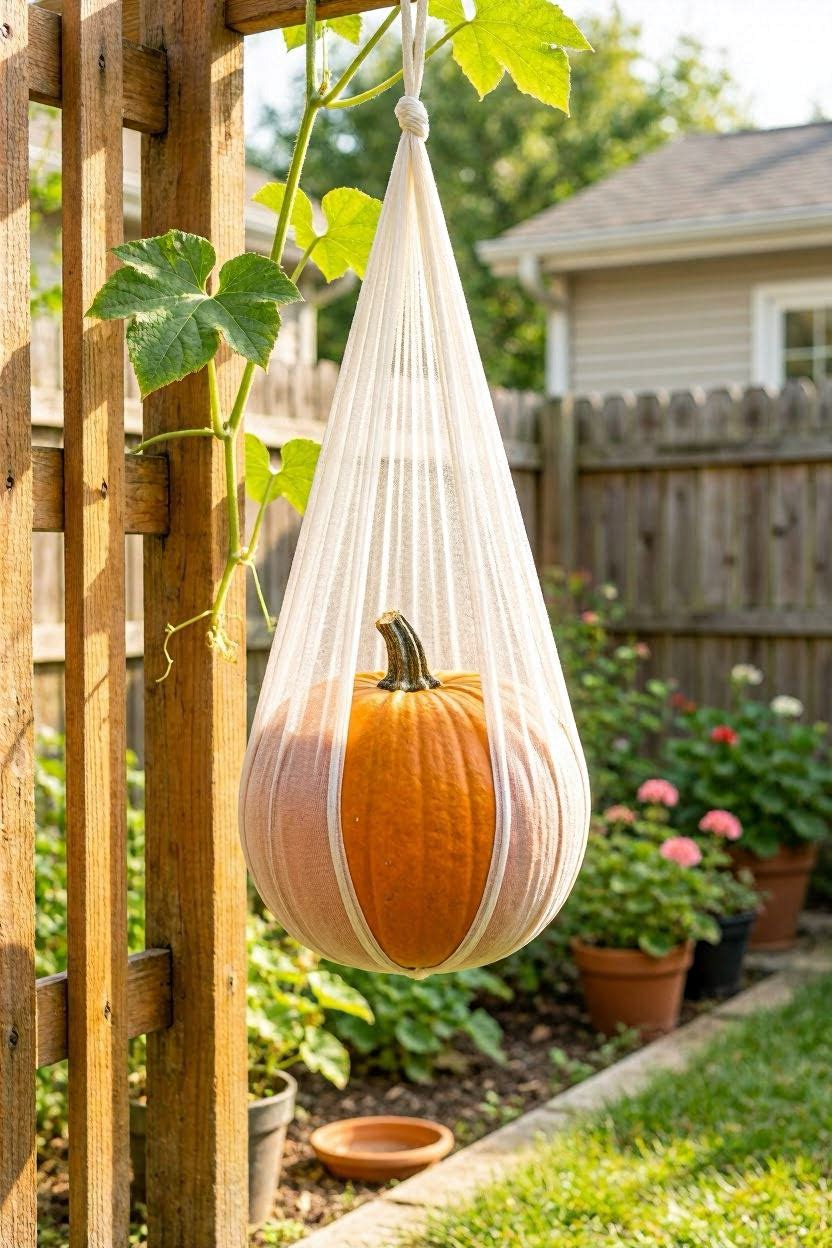
Section 5: How to Support Heavy Pumpkins (The Sling Method)
If your pumpkin grows bigger than expected, you’ll need to support the fruit’s weight — otherwise the stem can snap and you’ll lose it.
Step 5.1 — Make a Pumpkin Sling
Cut a strip of old pantyhose, a mesh produce bag, or a piece of cloth netting. Tie both ends to the trellis frame so the pumpkin rests in the fabric like a hammock. As the pumpkin grows, it stretches the sling gently without putting stress on the stem.
This technique works for any pumpkin over 2–3 pounds. Pantyhose is the classic choice — it stretches as the pumpkin grows. You can also buy pre-made fruit support slings at Amazon for about $10–$15 for a pack.
Section 6: Common Beginner Mistakes to Avoid
| Mistake | Why It’s a Problem | The Fix |
|---|---|---|
| Planting giant pumpkin varieties | Way too heavy for any trellis | Stick to varieties under 10 lbs |
| Building the trellis after planting | Hard to install without disturbing roots | Set up the trellis BEFORE you sow seeds |
| Not securing the base | Trellis tips over in wind or rain | Stake legs 4–6 inches into soil or use ground anchors |
| Skipping the sling | Heavy fruit snaps off the vine | Use a sling for any pumpkin over 2–3 lbs |
| Overwatering | Root rot and mold | Water deeply 2–3x per week, not daily |
| Planting in shade | Pumpkins need 6–8 hours of direct sun | Choose the sunniest fence or spot in your yard |
Section 7: Decorating Your Trellis for Fall
Once your pumpkin season is over (or even while it’s growing), your trellis is a beautiful decorative structure. Here are some ideas to make it shine:
- Wrap fairy lights around the frame for a cozy evening glow
- Hang dried corn stalks from the crossbars for a harvest look
- Add small gourds and mini pumpkins from the farmers market as decorations
- Plant marigolds at the base — they add bright orange color and naturally repel pests
- Paint the frame in a barn red, forest green, or matte black for a polished look
Final Thoughts
Growing pumpkins on a trellis is one of the most rewarding beginner gardening projects you can take on. It’s space-efficient, surprisingly simple, and the results look absolutely stunning in a backyard or garden bed.
Start small — grab a pack of Baby Boo seeds ($3 at Walmart), lean a couple of bamboo poles into a teepee shape, and just get planting. You’ll quickly see how naturally pumpkins take to climbing, and by mid-fall you’ll have a vertical garden feature that your neighbors will be asking about.
The most important thing is to just start. You don’t need a perfect trellis on day one. A fence line and a pack of seeds is enough. Build from there.
Frequently Asked Questions
Can I grow pumpkins in containers on a trellis?
Yes, but choose a container that holds at least 15–20 gallons of soil, and stick to miniature varieties like Baby Boo or Jack Be Little.
How tall should a pumpkin trellis be?
Aim for 5–6 feet tall. Pumpkin vines can grow 10–20 feet long, so you’ll need to redirect them horizontally once they reach the top.
Do pumpkins need a trellis to grow?
No — but a trellis helps them grow healthier, saves space, and makes it easier to spot and harvest your pumpkins.
How many pumpkin plants can grow on one trellis?
A 6-foot-wide trellis can comfortably support 2–3 plants. Give each plant about 2–3 feet of horizontal space.
When should I plant pumpkin seeds near my trellis?
In most US regions, plant after your last frost date — typically late May to early June. In warmer Southern states, you can plant as early as mid-April.
Can I reuse my trellis next year?
Absolutely! Wood and metal trellises last many seasons with basic care. Clean them off at the end of the season and store them in a dry place.