Lemon Blueberry Pound Cake Recipe (Moist, Buttery & Bursting with Flavor)
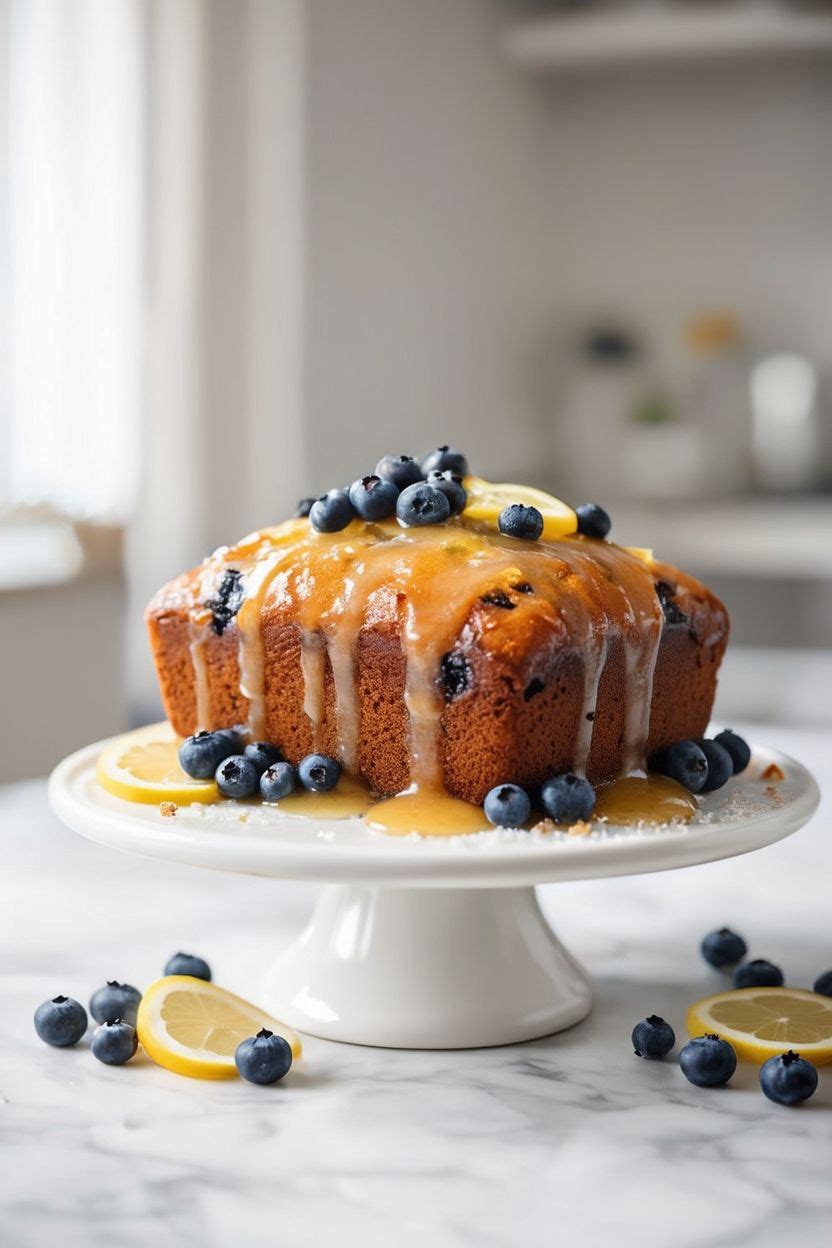
If you love a cake that tastes like a warm summer afternoon, this lemon blueberry pound cake is the one. It is buttery and dense in the best way, full of bright lemon flavor, and packed with juicy blueberries in every single slice. The lemon glaze on top is the finishing touch that takes it from good to absolutely outstanding.
This recipe is beginner-friendly. You do not need a stand mixer or any fancy equipment. Just a hand mixer, two bowls, and a standard loaf pan. Let’s get into it.
1. Why You Will Love This Recipe
This is not just another pound cake. Here is what makes it special:
- Real lemon flavor — both lemon zest and fresh lemon juice go into the batter and the glaze
- Juicy blueberries — tossed in flour first so they stay suspended throughout the cake instead of sinking
- Moist crumb — thanks to full-fat sour cream (or Greek yogurt), the texture stays soft for days
- Simple ingredients — nothing unusual; everything is available at any grocery store for under $15 total
- Freezer-friendly — slices freeze beautifully for up to 3 months
2. Ingredients You Will Need
Here is everything laid out before you start. Having all of your ingredients measured and at room temperature makes a big difference in how the cake turns out.
For the Cake
| Ingredient | Amount | Approx. Cost |
|---|---|---|
| All-purpose flour | 1 ½ cups (190g) | $0.30 |
| Baking powder | 1 tsp | $0.05 |
| Salt | ½ tsp | $0.02 |
| Unsalted butter, softened | ½ cup (115g / 1 stick) | $1.00 |
| Granulated sugar | 1 cup (200g) | $0.40 |
| Large eggs | 3, room temperature | $0.90 |
| Sour cream or full-fat Greek yogurt | ½ cup (120g) | $0.80 |
| Fresh lemon zest | 2 tablespoons (about 2 lemons) | $1.00 |
| Fresh lemon juice | 2 tablespoons | included above |
| Vanilla extract | 1 tsp | $0.20 |
| Fresh or frozen blueberries | 1 cup (150g) | $2.50 |
For the Lemon Glaze
| Ingredient | Amount | Approx. Cost |
|---|---|---|
| Powdered sugar (confectioners’ sugar) | 1 cup (120g) | $0.30 |
| Fresh lemon juice | 2–3 tablespoons | $0.50 |
| Lemon zest (optional) | 1 tsp | included |
Total estimated cost: around $8–$10 for a full loaf that serves 10–12 slices.
3. Equipment You Will Need
- 9×5 inch loaf pan
- Hand mixer or stand mixer
- Two large mixing bowls
- Rubber spatula
- Zester or fine grater
- Measuring cups and spoons
- Wire cooling rack
- Parchment paper
4. Step-by-Step Instructions
Step 1 — Prep Your Pan and Preheat the Oven
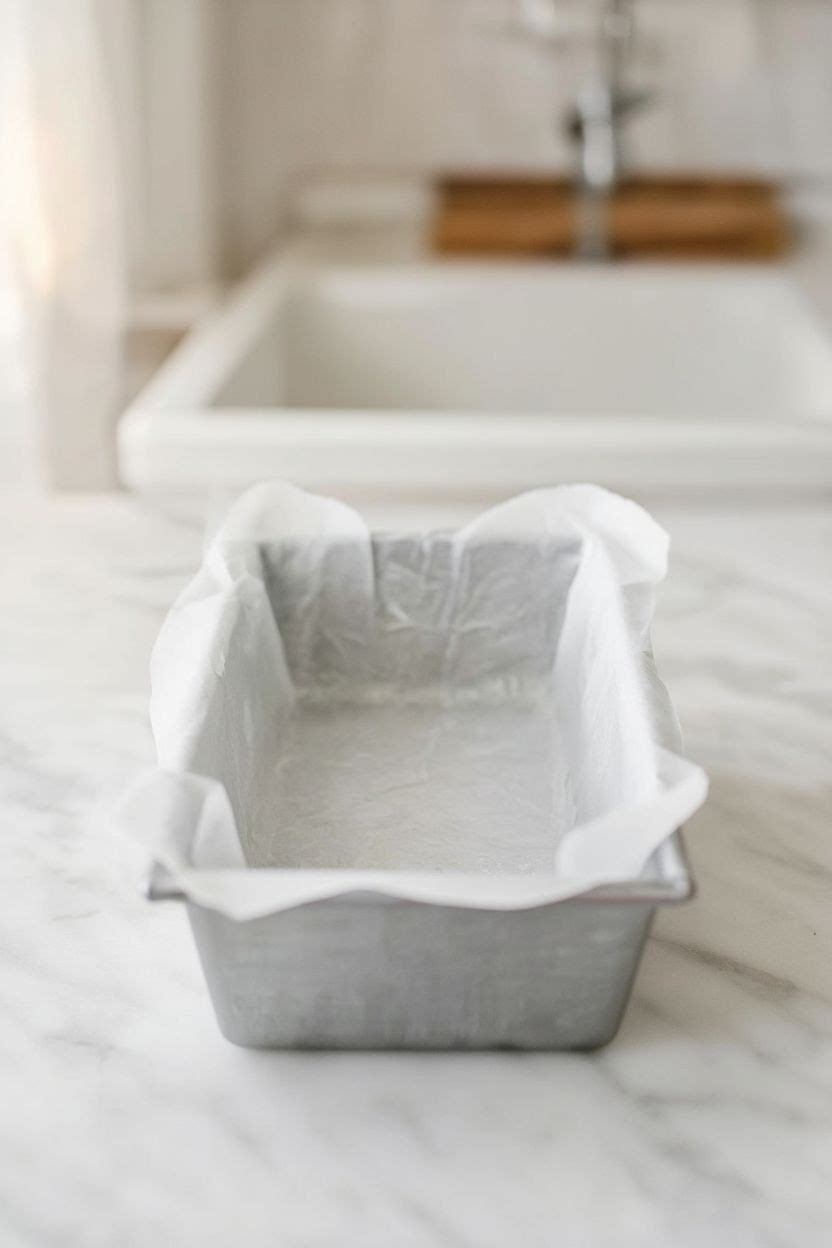
Preheat your oven to 350°F (175°C). Grease your 9×5 inch loaf pan with butter or non-stick spray, then line it with parchment paper, leaving a little overhang on the long sides. This makes it very easy to lift the finished cake out without it cracking or sticking.
Tip: Room temperature ingredients matter here. Cold butter won’t cream properly, and cold eggs can curdle the batter. Take everything out of the fridge about 30 minutes before you start.
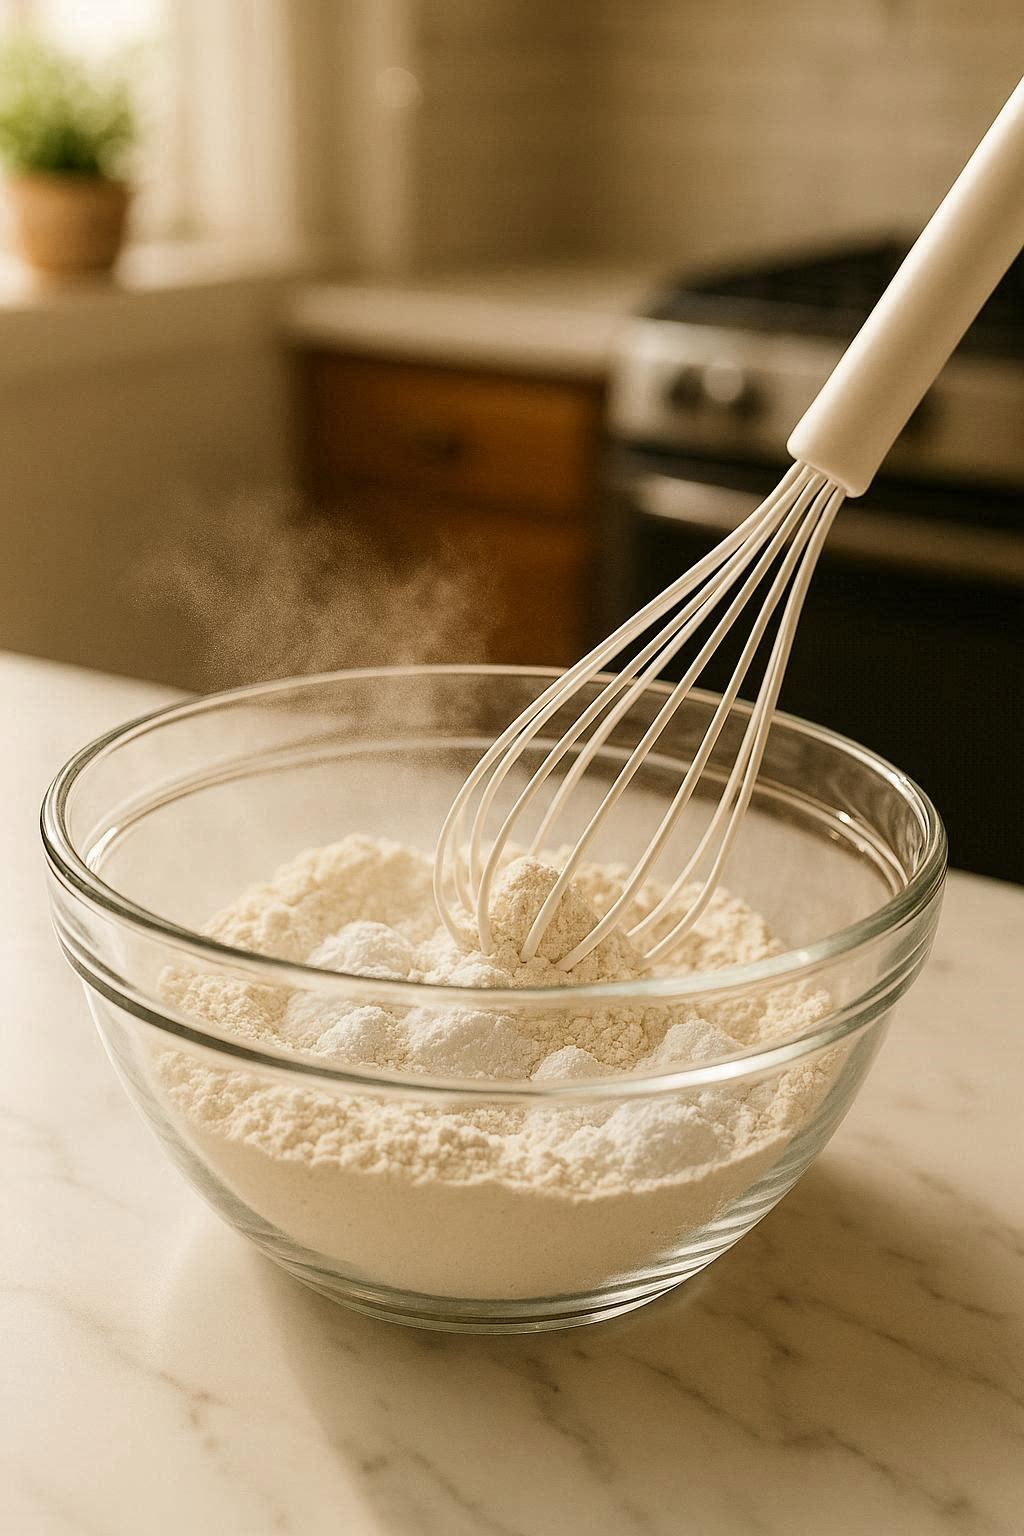
Step 2 — Mix the Dry Ingredients
In a medium bowl, whisk together the flour, baking powder, and salt. Set this aside. Whisking the dry ingredients separately ensures the leavening is evenly distributed throughout the batter, which gives you an even rise.
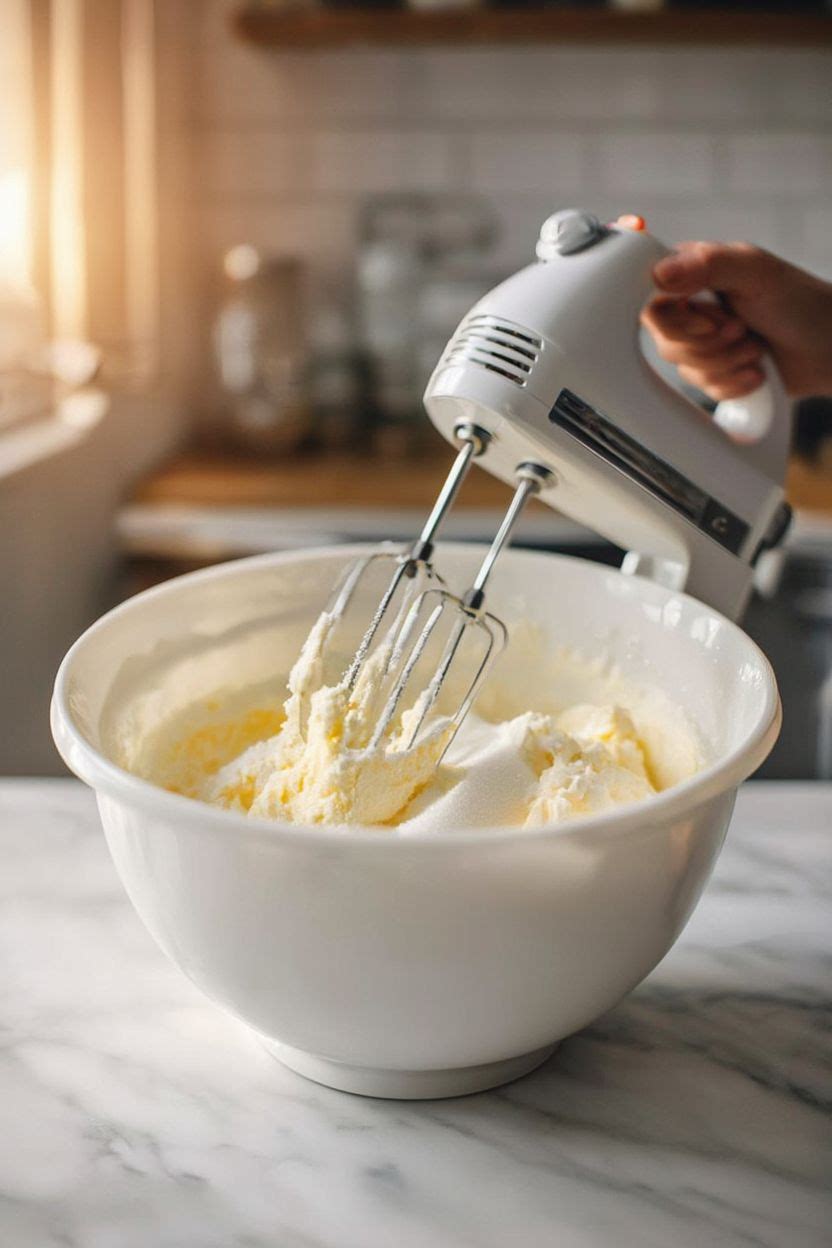
Step 3 — Cream the Butter and Sugar
In your large bowl, beat the softened butter and granulated sugar together on medium-high speed for about 3–4 minutes. You want it to look pale, fluffy, and almost like whipped cream. Do not rush this step — proper creaming traps air in the batter and is one of the key reasons the cake is light despite being a pound cake.
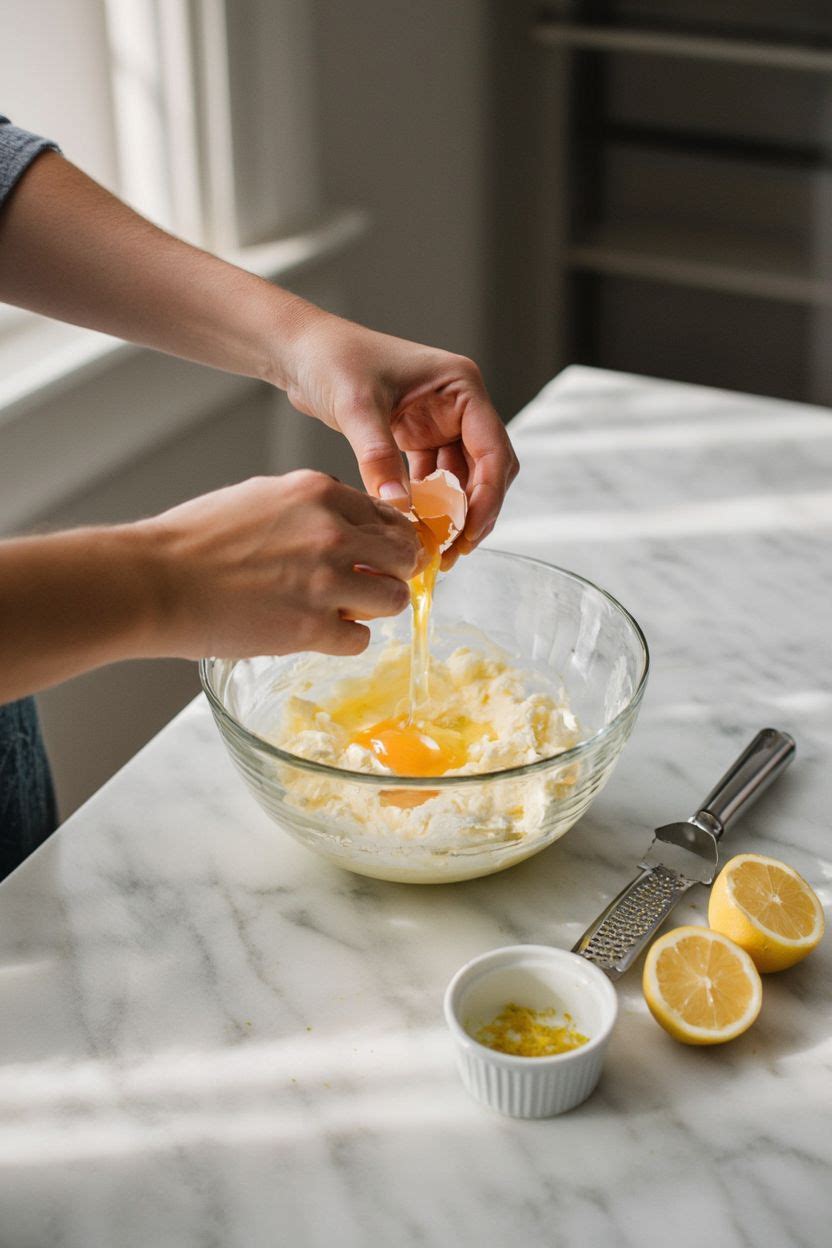
Step 4 — Add Eggs, Lemon, and Vanilla
Add the eggs one at a time, beating well after each one. Then mix in the lemon zest, lemon juice, and vanilla extract. The mixture may look slightly curdled at this point — that is completely normal and will come together once the flour goes in.
Lemon zest tip: Zest your lemons before juicing them — it’s much easier that way. Use a microplane or the fine side of a box grater. Only zest the yellow part; the white pith is bitter.
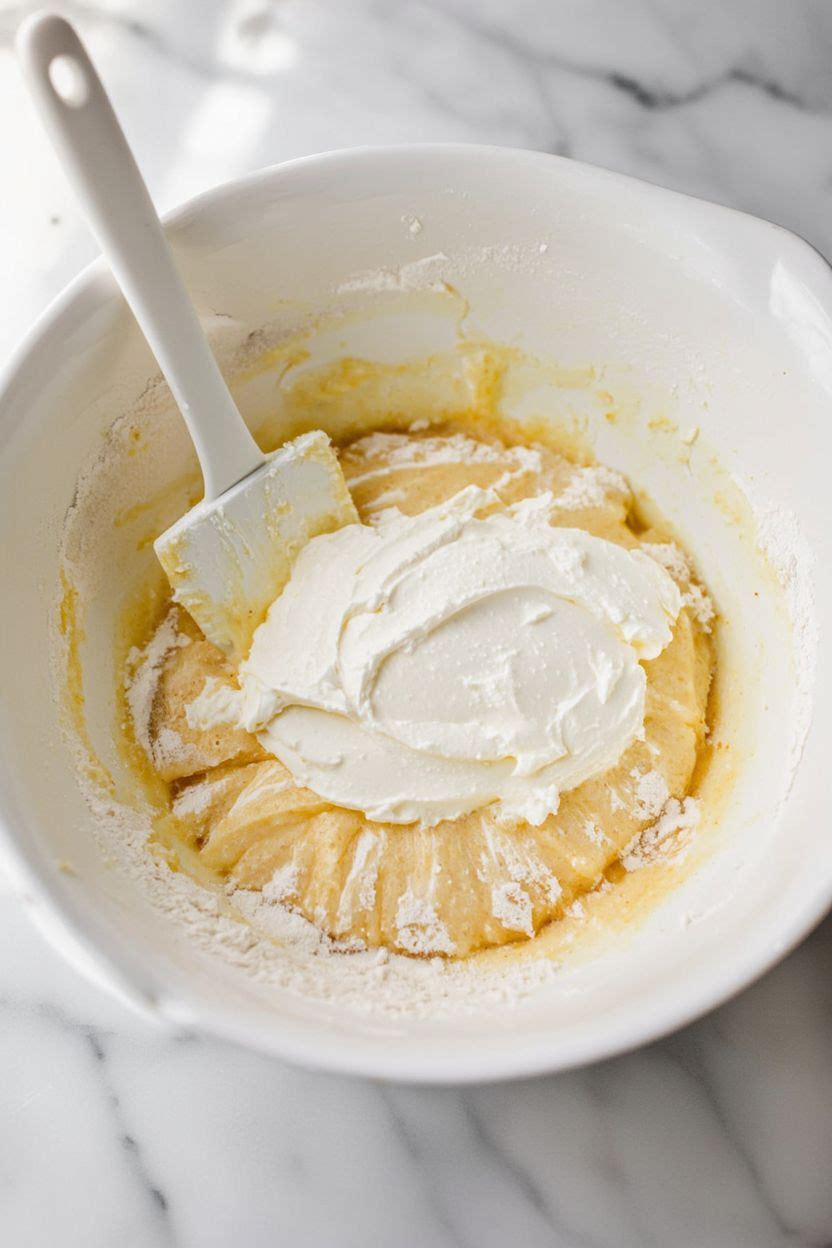
Step 5 — Alternate Dry Ingredients and Sour Cream
Add the flour mixture and sour cream to the batter in alternating additions: start with one-third of the flour, then half the sour cream, then another third of flour, remaining sour cream, and finish with the last of the flour. Mix on low speed just until each addition is combined. Overmixing at this stage develops gluten and makes the cake tough.
Step 6 — Coat the Blueberries and Fold In
In a small bowl, toss the blueberries with about 1 tablespoon of all-purpose flour (taken from your measured amount or an extra tablespoon). The flour coating helps the berries grip the batter so they don’t all sink to the bottom during baking. Gently fold them into the finished batter using a rubber spatula.
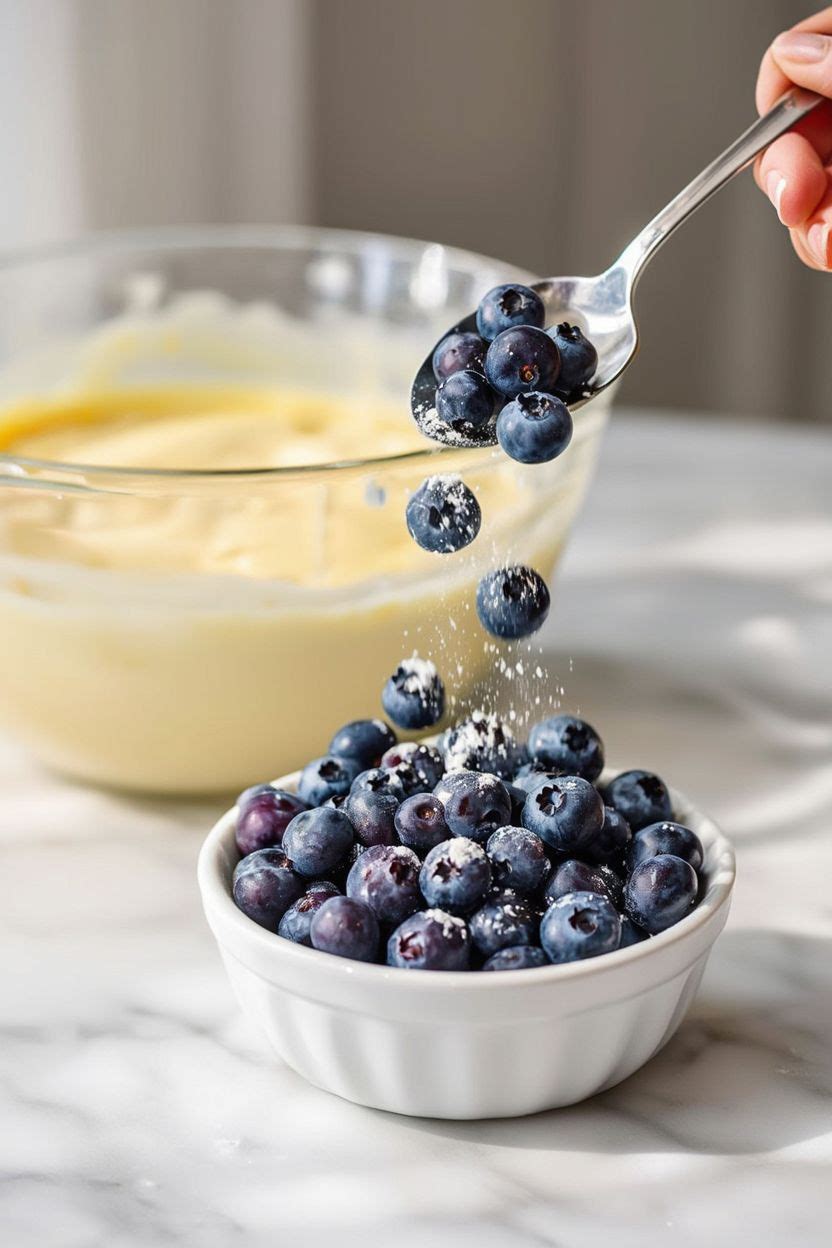
Fresh vs. frozen blueberries: Both work. If using frozen, do not thaw them first — add them straight from the freezer. Thawed blueberries release too much liquid and can turn your batter purple.
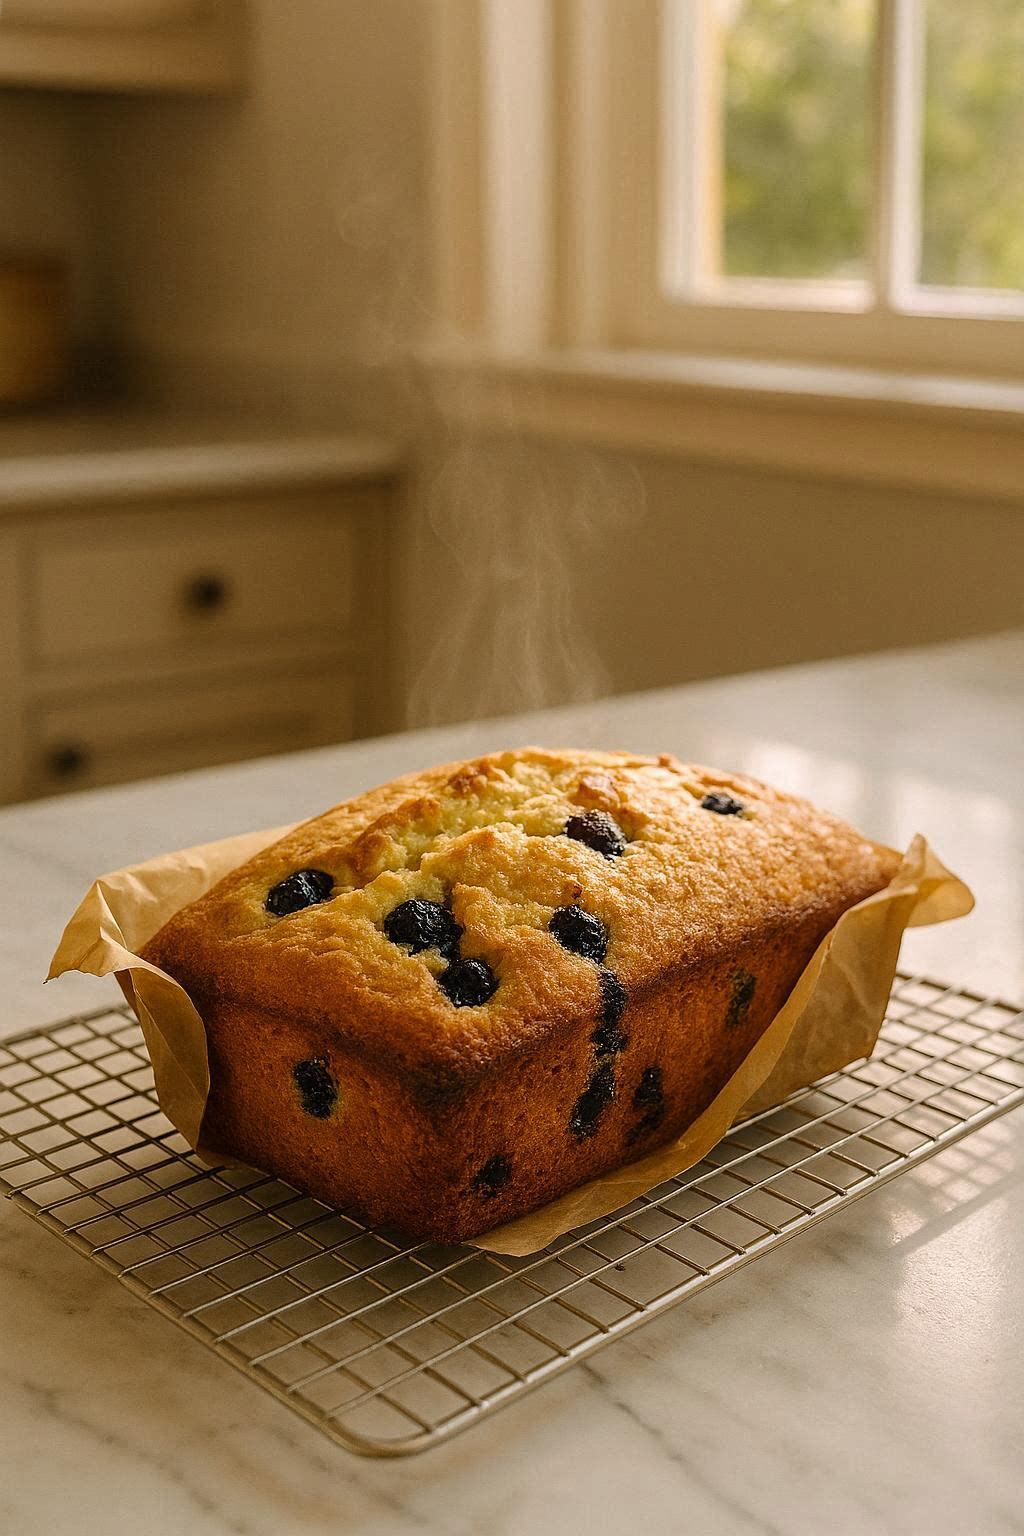
Step 7 — Pour and Bake
Pour the batter into your prepared loaf pan and smooth the top with your spatula. Bake at 350°F for 55–65 minutes. The cake is done when a toothpick inserted into the center comes out clean (a few moist crumbs are fine; wet batter is not). The top should be golden brown and slightly cracked down the middle — that crack is completely normal and is actually a sign of a good pound cake.
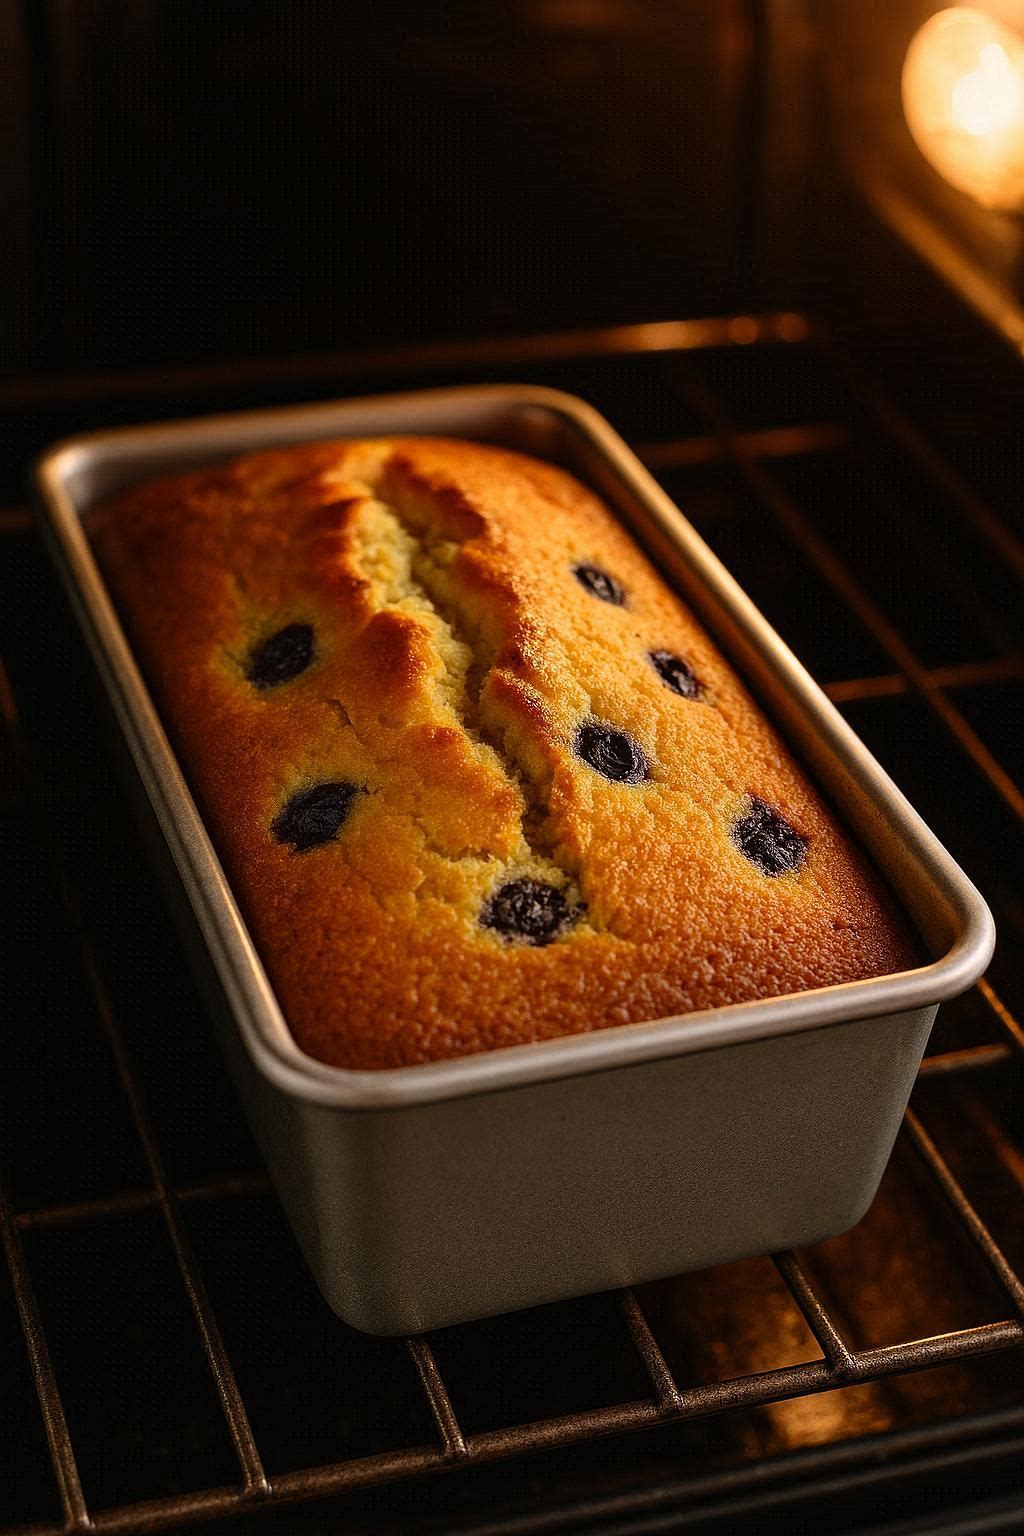
Tent with foil: If the top is browning too fast before the inside is done, loosely lay a piece of foil over the top for the last 15–20 minutes of baking.
Step 8 — Cool Before Glazing
Let the cake cool in the pan for 15 minutes, then use the parchment paper to lift it out onto a wire rack. Allow it to cool for at least 45 minutes before adding the glaze. If the cake is too warm, the glaze will just run straight off and not set properly.
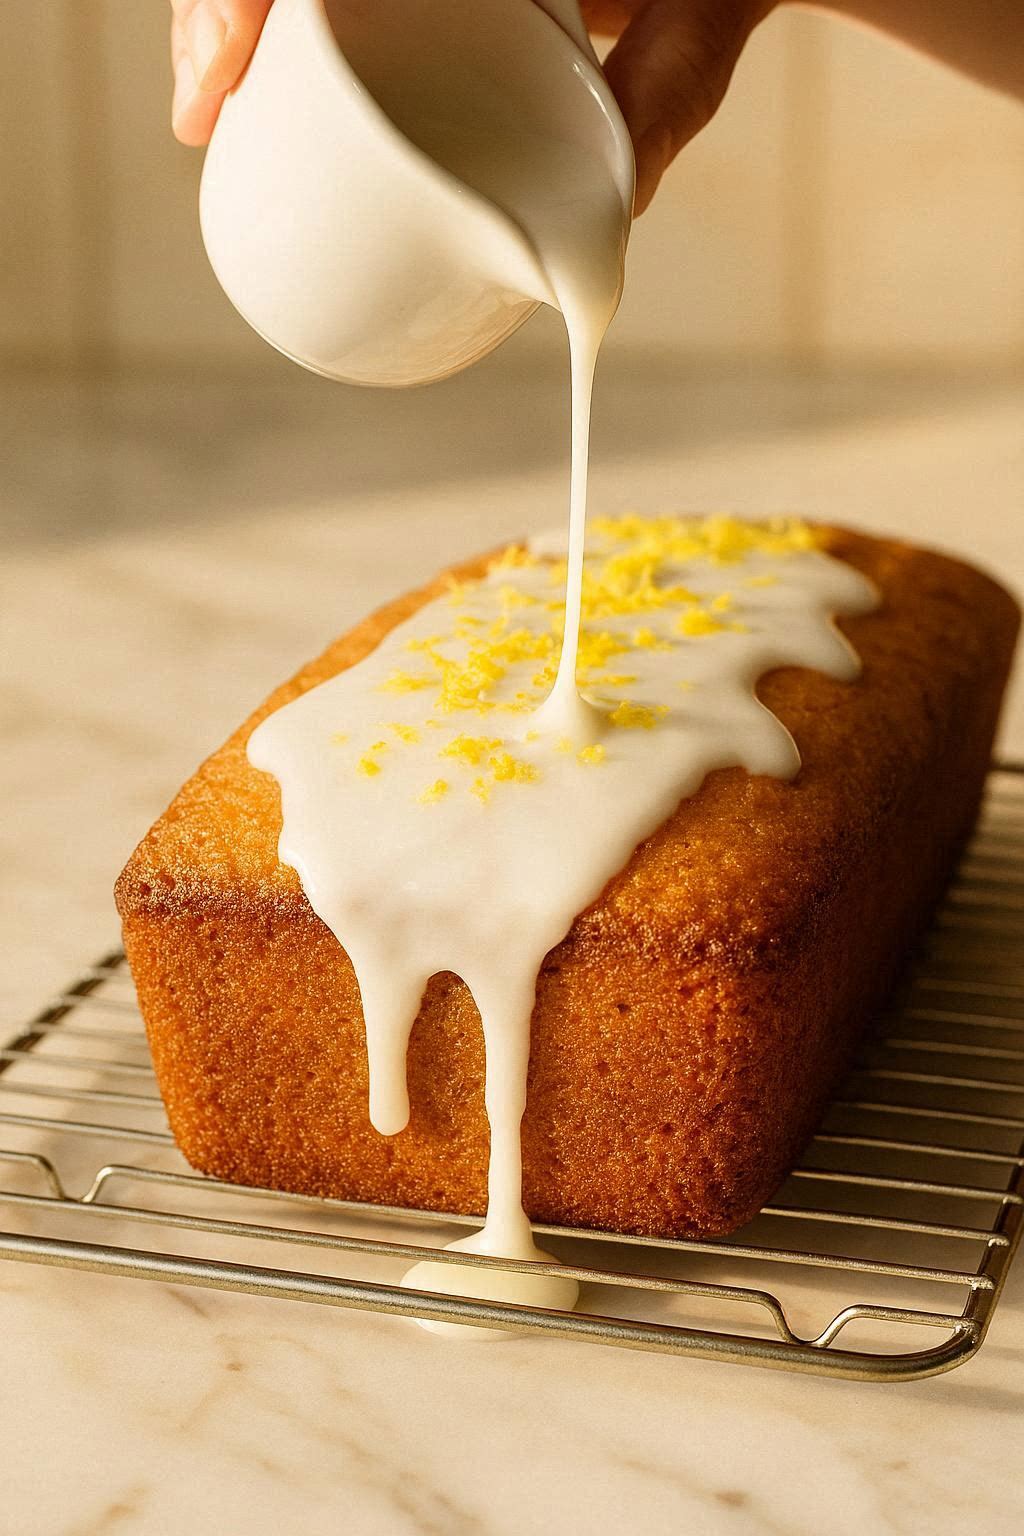
Step 9 — Make the Lemon Glaze and Drizzle
Whisk together the powdered sugar and fresh lemon juice, starting with 2 tablespoons of juice and adding more if needed to reach a thick but pourable consistency. It should coat the back of a spoon but still drizzle slowly. Pour or spoon it over the cooled cake and let it drip naturally down the sides. Add a little extra lemon zest on top for color and aroma.
5. Storage and Freezing Guide
| Method | Duration | Notes |
|---|---|---|
| Room temperature (covered) | Up to 3 days | Store in an airtight container or wrap tightly in plastic |
| Refrigerator | Up to 1 week | Bring to room temp before serving for best texture |
| Freezer (whole or sliced) | Up to 3 months | Wrap individual slices in plastic, then foil; thaw overnight in fridge |
6. Common Substitutions
| Original Ingredient | Substitution |
|---|---|
| Sour cream | Full-fat Greek yogurt (1:1 swap) |
| Fresh blueberries | Frozen blueberries (do not thaw) |
| Unsalted butter | Salted butter (omit the added salt) |
| All-purpose flour | 1:1 gluten-free baking flour blend |
| Lemon zest + juice | 1 tsp lemon extract (less fresh flavor) |
7. Frequently Asked Questions
Why did my blueberries sink to the bottom? The most common reason is that the batter was too thin, or the blueberries weren’t coated in flour. Make sure to use the flour-tossing trick in Step 6.
Can I make this in a Bundt pan? Yes! Use a 10-cup Bundt pan and bake at 350°F for 45–55 minutes. Check earlier than you think — Bundt cakes bake faster due to the center tube.
Can I double the recipe? Absolutely. Use two loaf pans side by side or a large Bundt pan. Baking time stays roughly the same.
My cake is gummy inside — what went wrong? This usually means it was underbaked or too much moisture got in (from un-dried pan or wet berries). Always check with a toothpick and tent the top if the outside is browning too fast.
8. Final Thoughts
This lemon blueberry pound cake hits every note you want in a baked good — it’s tangy, sweet, moist, and just a little bit fancy looking with that dripping glaze. But it’s also genuinely simple to make, even if you’re new to baking.
The sour cream keeps it tender for days, the double dose of lemon (zest and juice) gives it real brightness, and the blueberries turn jammy and sweet as they bake. It works for brunch, dessert, afternoon tea, or an edible gift wrapped in parchment and tied with twine.
Give it a try this weekend and let me know how it goes in the comments below!
Tried this recipe? Save it to Pinterest so you can find it again, and tag me if you share a photo — I love seeing your bakes!