Raised Garden Bed Trellis Arch Ideas That Transform Your Backyard Into a Dream Garden
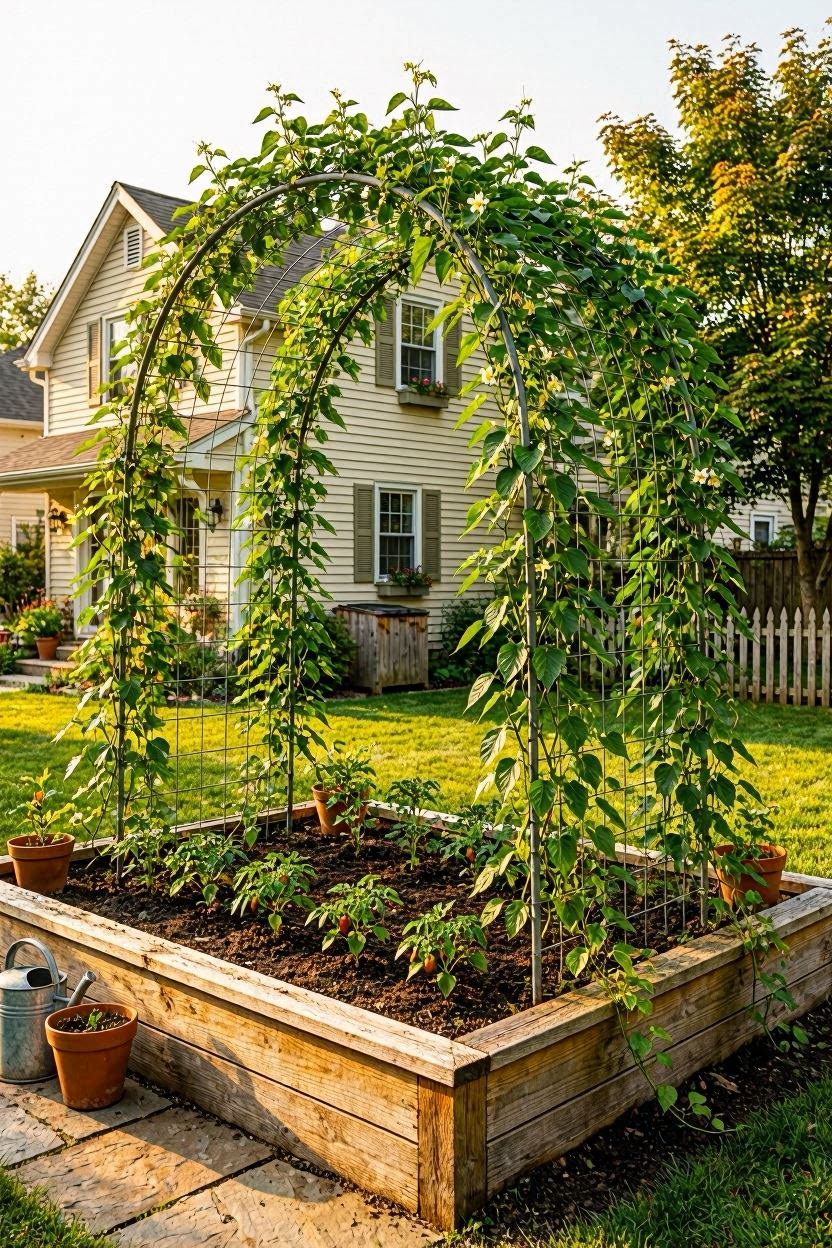
Adding a trellis arch to your raised garden bed is one of the simplest ways to make your backyard look like it belongs in a magazine. It gives climbing plants somewhere to go, doubles your growing space, and honestly — it just looks gorgeous.
Whether you’re growing cucumbers, roses, beans, or sweet peas, this guide walks you through everything you need to know: picking the right arch style, choosing materials, building it yourself, and making it last for years.
1. Why Add a Trellis Arch to a Raised Garden Bed?
Before you spend a dollar, it’s worth knowing exactly what you’re getting.
A trellis arch does three things at once:
- Vertical growing space — plants go up instead of sprawling sideways, so you grow more in less space
- Better airflow — climbing plants on a trellis dry faster after rain, which means fewer fungal diseases
- A visual focal point — an arch over a garden bed gives your yard structure and intentional design
Most beginner gardeners add a flat trellis panel at the back of the bed. That works fine. But an arch that spans the full width of the bed? That’s the upgrade that makes visitors stop and ask, “Where did you get that?”
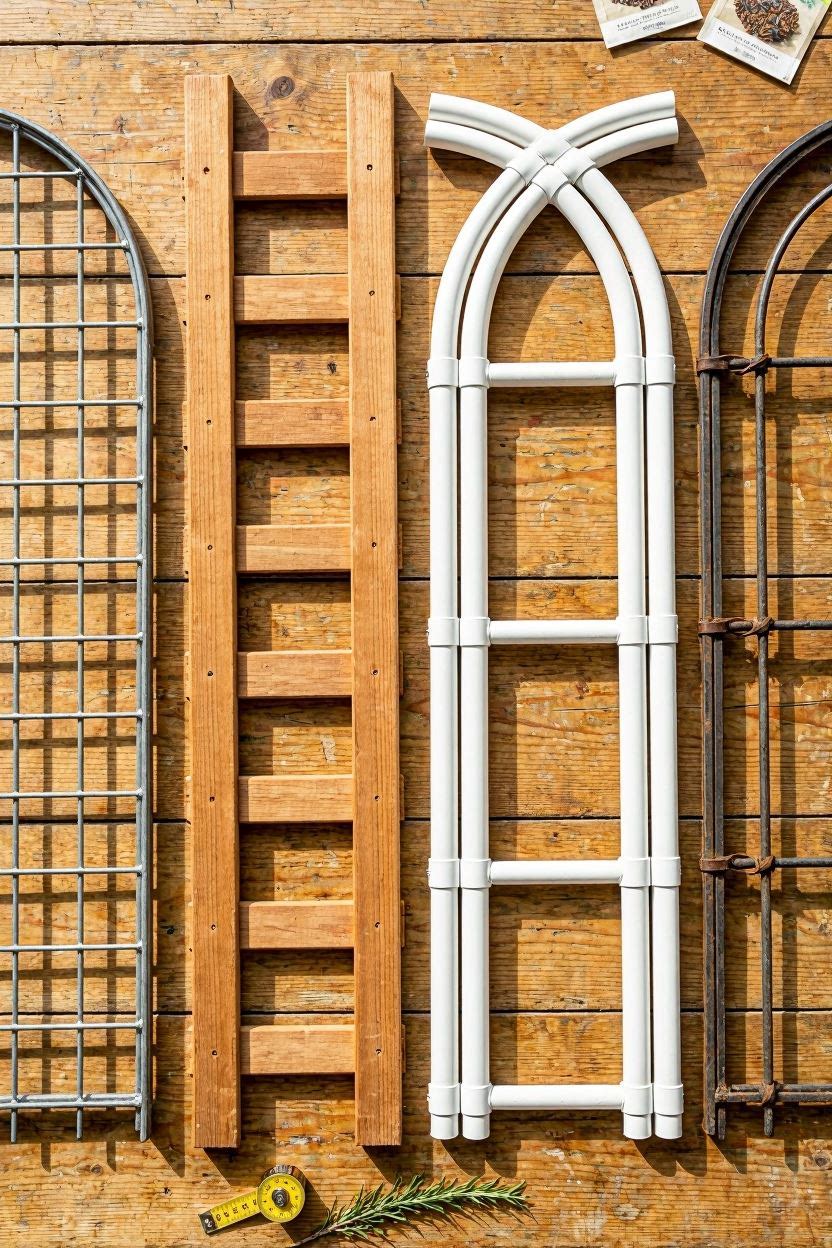
2. Choosing the Right Trellis Arch Style
There’s no single “best” arch. The right one depends on your garden size, your budget, and the plants you want to grow.
| Style | Best For | Approx. Cost | Where to Buy |
|---|---|---|---|
| Metal cattle panel arch | Cucumbers, squash, melons | $30–$60 | Tractor Supply, Rural King |
| Cedar wood arch | Roses, clematis, sweet peas | $80–$200 | Home Depot, local lumber yards |
| PVC pipe arch | Lightweight vines, netting | $15–$40 | Home Depot, Lowe’s |
| Pre-made garden arch kit | All-purpose, fast setup | $50–$150 | Amazon, Wayfair, Gardener’s Supply |
| Wrought iron arch | Formal gardens, perennial climbers | $100–$300 | Wayfair, Target, local nurseries |
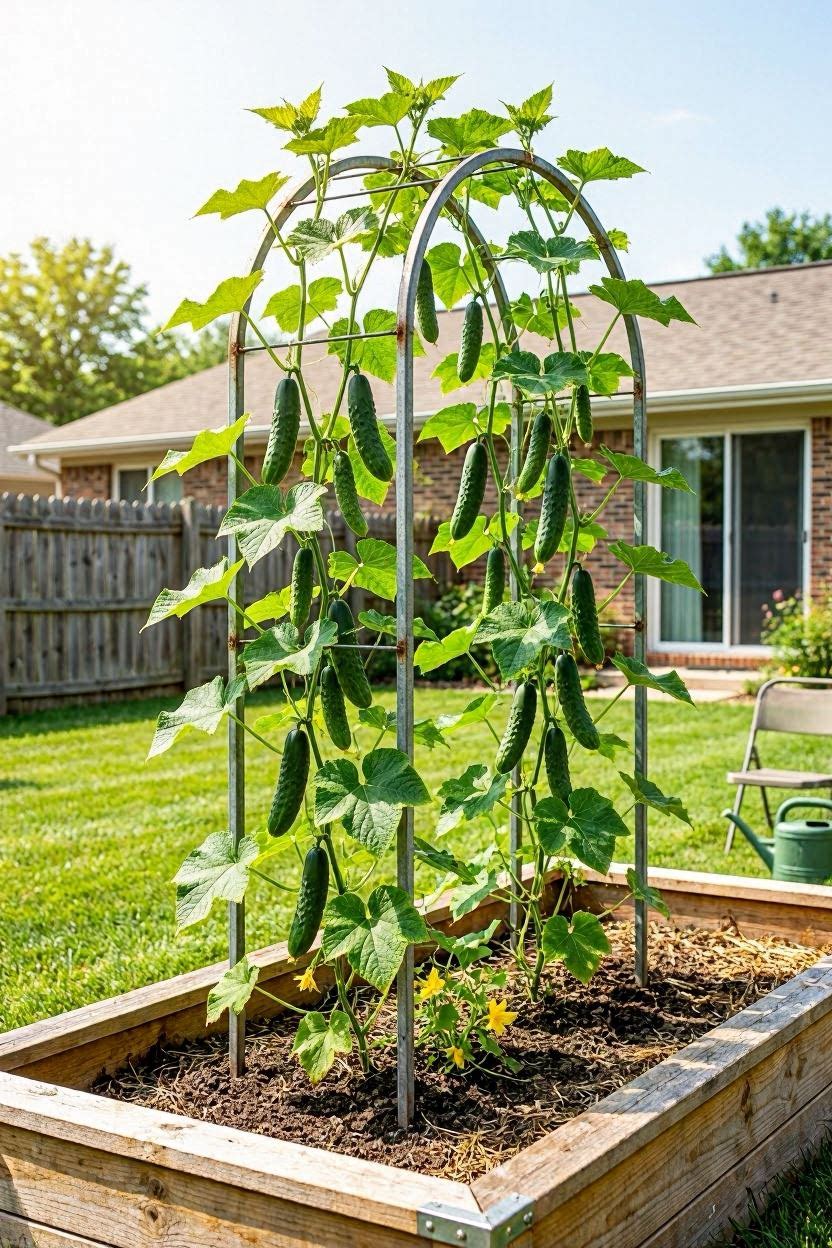
For most beginners, the cattle panel arch is the sweet spot — it’s strong, cheap, and lasts decades with almost zero maintenance.
3. Planning Your Arch — Measurements That Actually Matter
Getting the size right upfront saves you a headache later.
3.1 Width
Your arch should span the full inner width of your raised bed. Most standard raised beds are 4 feet wide. A 4-foot arch fits perfectly and still lets you reach the center from either side.
3.2 Height
This depends entirely on what you’re growing:
- Short vines (beans, peas): 5–6 feet tall is enough
- Medium climbers (cucumbers, small squash): 6–7 feet
- Tall climbers (roses, clematis, large gourds): 7–8 feet
Go a little taller than you think you need. Plants grow fast, and walking through a 5-foot arch while carrying a basket of tomatoes is not fun.
3.3 Depth / Leg Spacing
The legs of your arch should sit inside the raised bed walls, not outside. Aim for legs to be 12–18 inches from the short ends of the bed. This keeps the arch stable and keeps the visual proportions clean.
4. Step-by-Step: How to Build a Cattle Panel Trellis Arch
This is the most popular DIY method in the USA right now — for good reason. One cattle panel (16 feet long, $25–$35 at Tractor Supply) plus four metal T-posts ($4–$6 each at any farm supply store) is all you need.
What You’ll Need
| Material | Quantity | Approximate Cost |
|---|---|---|
| 16-ft cattle panel (4”×4” grid) | 1 | $28–$35 |
| 6-ft metal T-posts | 4 | $18–$24 total |
| Heavy-duty zip ties or wire | 1 bag | $5–$8 |
| Post driver or rubber mallet | 1 | Borrow or rent |
| Work gloves | 1 pair | $6–$10 |
Total estimate: $55–$80
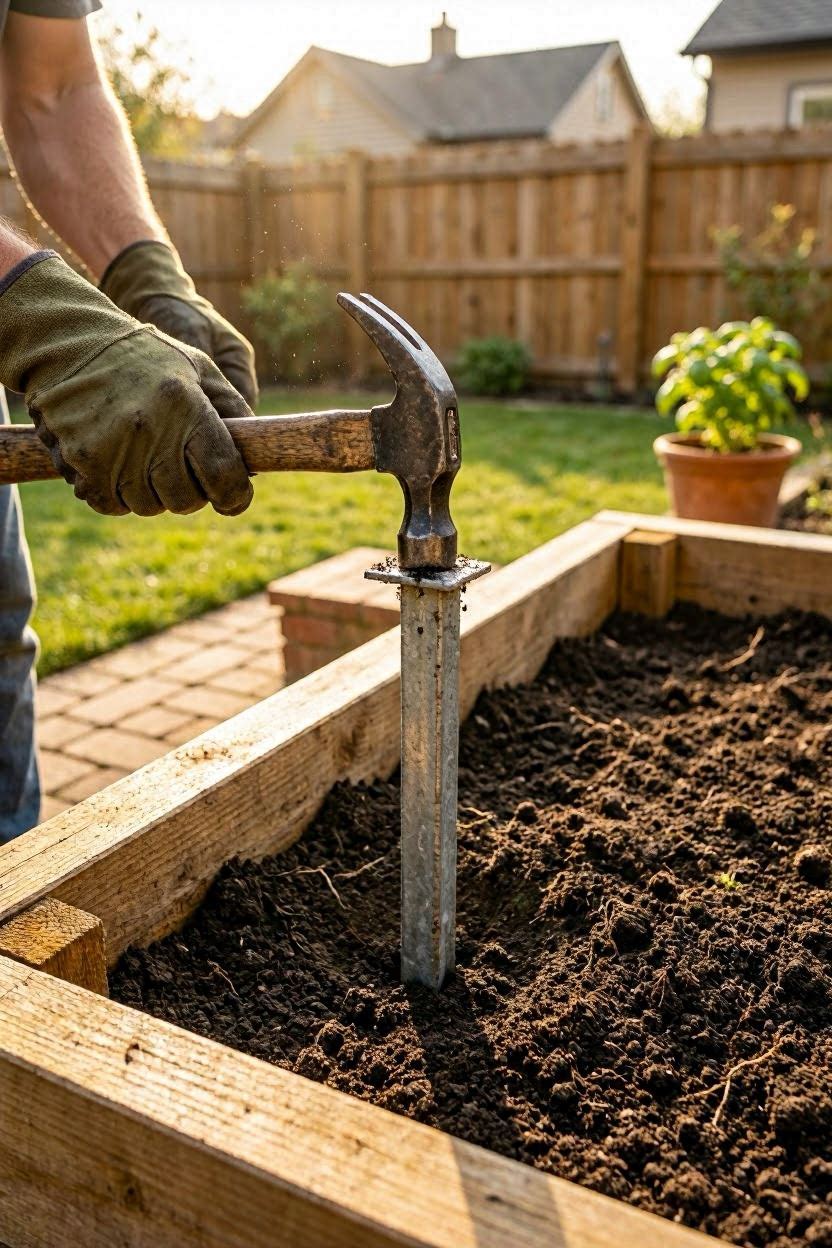
Step 1 — Drive the T-Posts
Drive two T-posts into the soil inside each short end of your raised bed, about 12 inches apart (matching your planned arch width). Drive them at least 12 inches deep so they don’t shift.
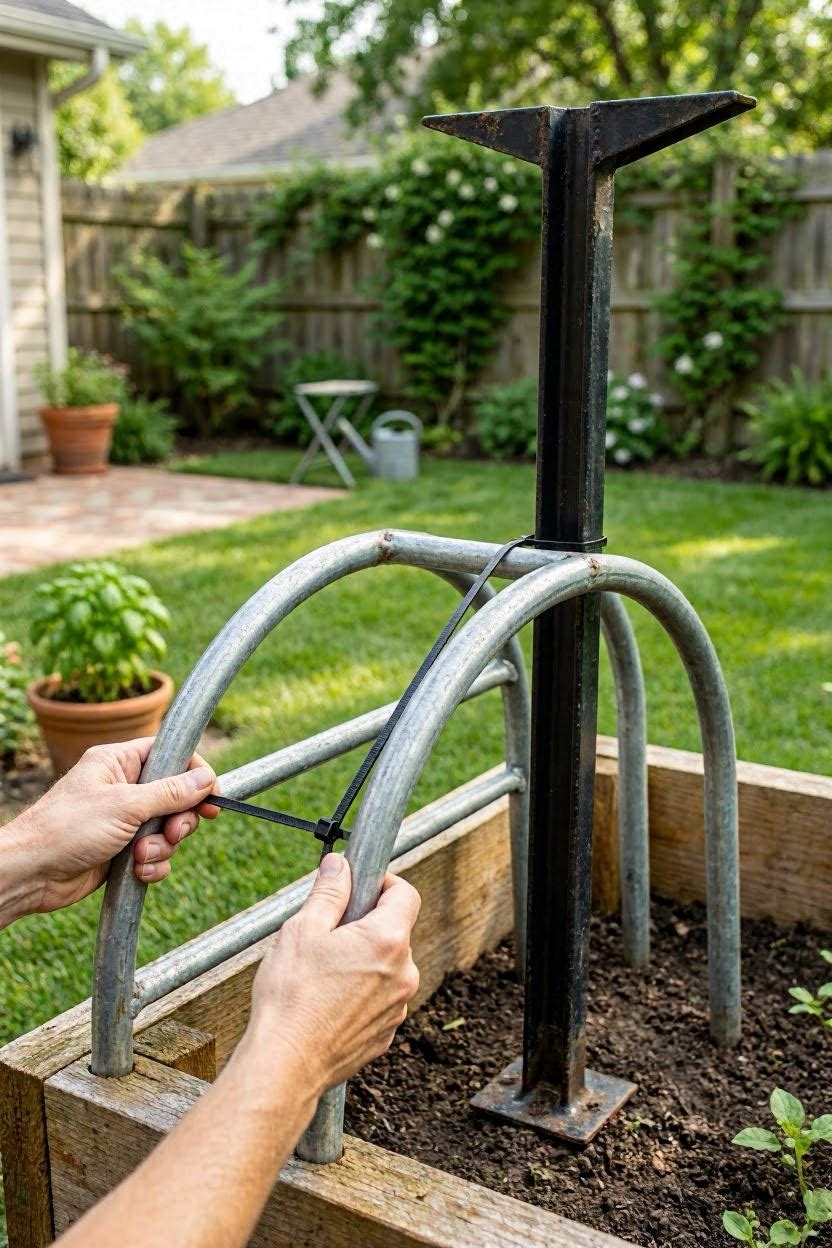
Step 2 — Bend the Cattle Panel Into an Arch
This is a two-person job. Stand the cattle panel on its long edge between the two sets of posts. Have one person hold each end while the other gently pushes the center of the panel upward. The panel naturally wants to curve — let it.
Step 3 — Secure the Ends to the Posts
Once the panel is arched to your desired height, zip-tie or wire each corner of the panel to its T-post. Use at least 3–4 ties per post. Pull them tight. Test by pressing down on the arch — it should not wobble.
Step 4 — Check Your Height and Shape
Stand back and look at it from both ends. Is the arch centered? Is the peak at the height you wanted? Adjust now by loosening a tie or two before planting anything.
That’s it. You have a functional, durable trellis arch for under $80.
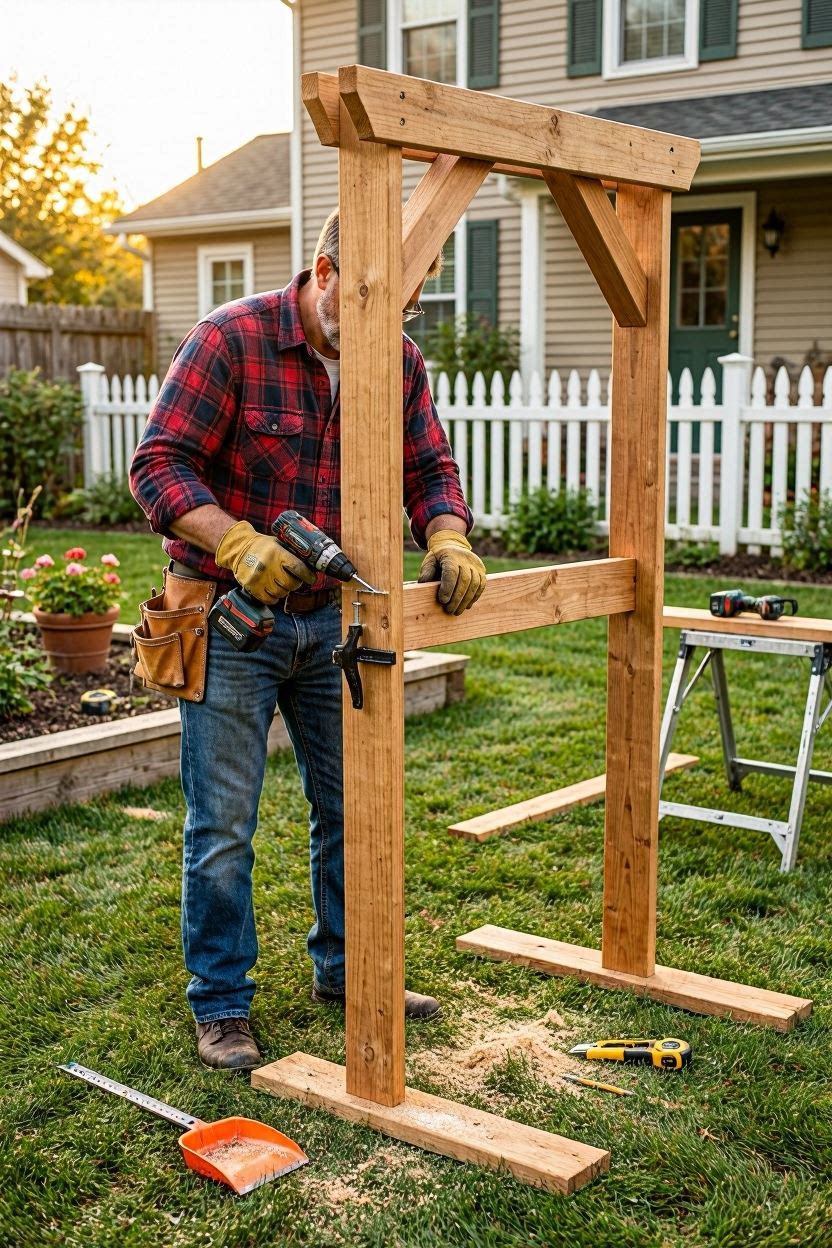
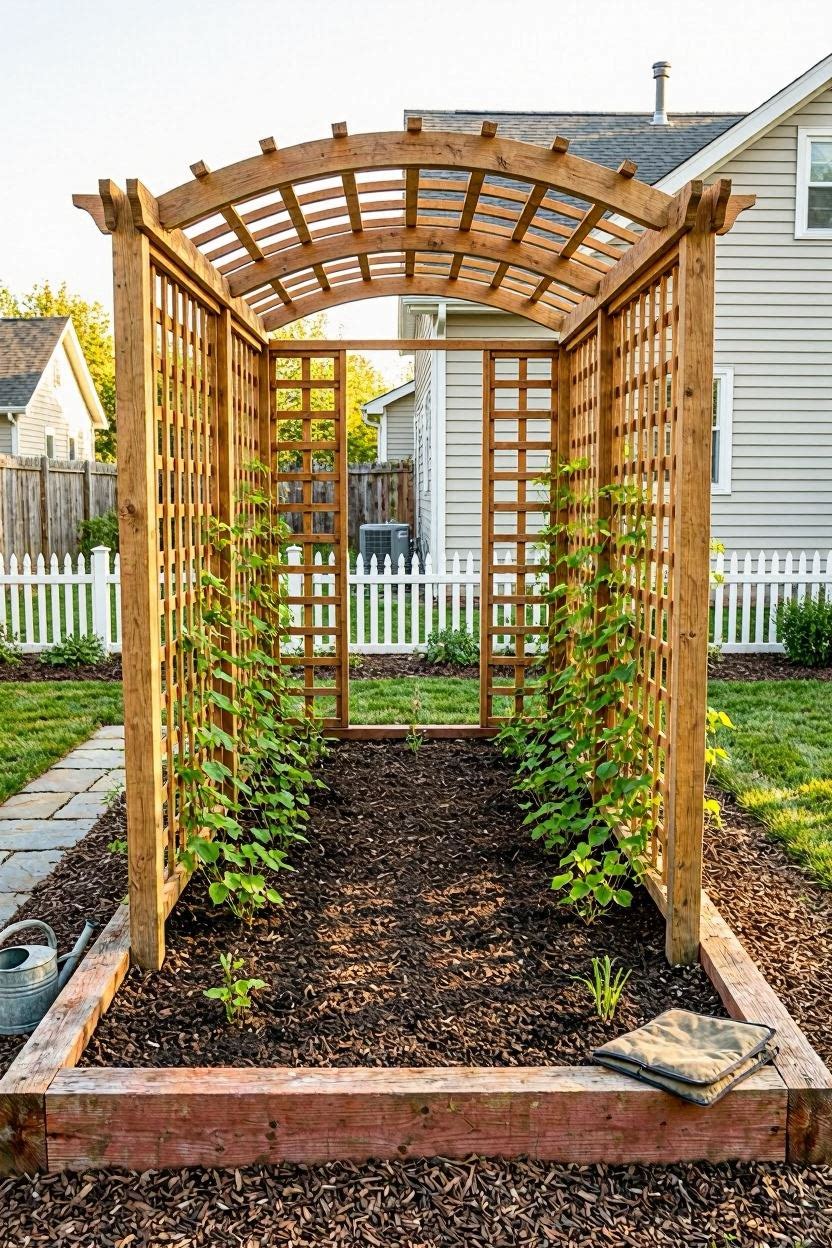
5. Step-by-Step: How to Build a Cedar Wood Trellis Arch
If you want something that looks more polished — something guests will comment on — a cedar arch is worth the extra work and cost.
What You’ll Need
| Material | Size | Approx. Cost |
|---|---|---|
| Cedar 2×4 boards | 4 at 8 ft | $40–$55 |
| Cedar lattice panels | 2 pieces | $25–$35 |
| Galvanized screws (exterior rated) | 1 box (3-inch) | $8–$12 |
| Wood post anchors (metal) | 4 | $12–$20 |
| Exterior wood stain or sealant | 1 quart | $15–$25 |
| Drill + saw | — | Borrow or own |
Total estimate: $100–$150
Step 1 — Cut Your Arch Uprights
Cut two pairs of 2×4 boards to your target arch height (typically 6.5–7 feet for a 4-foot-wide bed). These four pieces become the four vertical legs — two legs per side of the bed.
Step 2 — Build the Side Frames
For each side, screw two uprights to horizontal crossbars at the top and bottom. This creates two rectangular side frames — one for each short end of your raised bed.
Step 3 — Add the Lattice Panels
Cut the cedar lattice to fit inside each side frame and screw it in place. This is what your plants will actually climb. Lattice with 2-inch diamond or square openings works best for most climbers.
Step 4 — Set the Posts in the Bed
Anchor the bottom of each leg with a metal post anchor driven into the soil inside the raised bed walls. This keeps wood off wet soil (extending its life significantly) and lets you remove the arch at the end of season if needed.
Step 5 — Connect the Two Sides at the Top
Add a top crossbar or two spanning across the arch from side to side. This ties the whole structure together and is where you can hang string lights, shade netting, or allow trailing plants to cascade.
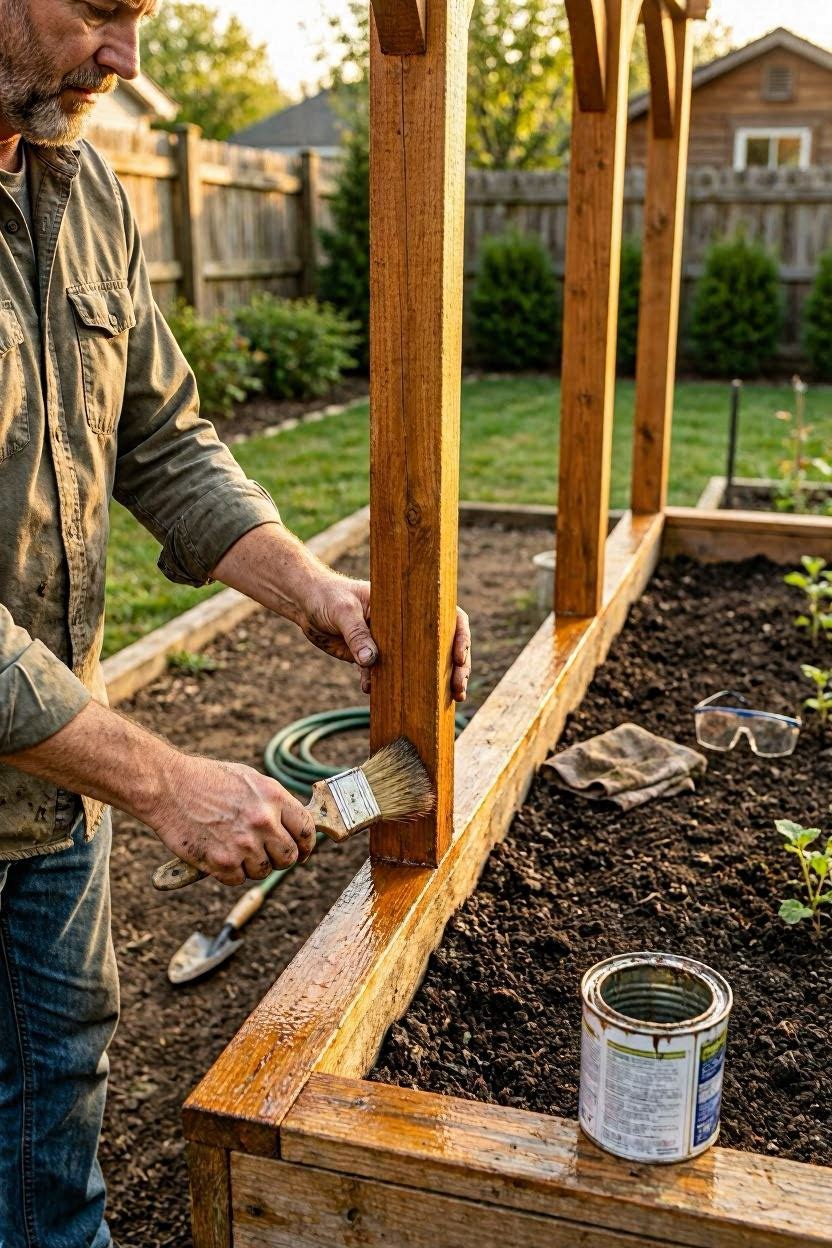
Step 6 — Seal and Stain
Before planting, apply an exterior wood stain or sealant to all surfaces. This one step can triple the lifespan of your cedar arch. Reapply every 2–3 years.
6. Best Plants to Grow on a Raised Bed Trellis Arch
The arch is only as good as what’s growing on it. Here are the best performers for USA home gardens:
| Plant | Type | Season | Grows to Height | Notes |
|---|---|---|---|---|
| Cucumbers | Vegetable | Summer | 5–6 ft | Easier to harvest, less disease |
| Pole beans | Vegetable | Summer | 5–8 ft | Fast-growing, great for beginners |
| Climbing roses | Flower | Spring–Fall | 8–15 ft | Needs strong arch, stunning results |
| Clematis | Flower | Spring–Fall | 6–12 ft | Thrives on cedar or iron arch |
| Sweet peas | Flower | Spring | 4–6 ft | Gorgeous scent, cottage garden vibe |
| Scarlet runner beans | Veggie + Flower | Summer | 6–10 ft | Edible AND beautiful |
| Small pumpkins | Vegetable | Summer–Fall | 6–8 ft | Use netting slings to support fruit |
7. Tips for Making Your Trellis Arch Last Longer
A little maintenance goes a long way.
For metal arches:
- Check for rust spots each spring — treat immediately with rust converter spray ($8 at Home Depot)
- Re-tighten zip ties or wire connections after winter
- Cattle panels are galvanized and essentially rust-proof, but T-posts can rust at soil level — check every few years
For wood arches:
- Reapply exterior sealant every 2–3 years
- Use metal post anchors so wood legs never sit directly in wet soil
- Cedar and redwood naturally resist rot — avoid pressure-treated lumber near food plants
For all arches:
- Trim plants back at end of season before they harden onto the structure
- Store PVC arches indoors over winter if possible — UV breaks PVC down over time
8. Adding Finishing Touches — Make It Look Like a Magazine Garden
The arch does the heavy lifting, but small details push it from “functional” to “wow.”
- String lights — Wrap warm-white Edison string lights along the top of the arch. Solar-powered options from Amazon ($15–$25) need zero wiring.
- Plant labels — Simple wooden stake labels at the base of each climbing plant look thoughtful and organized
- Mulch pathways — Line the walking area around the bed with wood chip mulch ($4–$6 a bag at Lowe’s). It makes the whole area feel intentional.
- Companion planting at the base — Grow low flowers like marigolds or nasturtiums at the base of the arch. They deter pests and fill in the visual space beautifully.
9. Common Mistakes to Avoid
| Mistake | Why It’s a Problem | Easy Fix |
|---|---|---|
| Arch too narrow | Plants crowd the opening, hard to walk through | Go at least 30 inches wide for a walkthrough arch |
| Legs not anchored deep enough | Arch falls over in wind or when plants load up | Drive legs or posts at least 12 inches into the soil |
| Using untreated wood | Rots in 2–3 seasons in wet climates | Always use cedar, redwood, or sealed pine |
| Planting too close to legs | Root competition, hard to maintain arch | Keep 4–6 inches of clearance at each leg |
| Forgetting to train plants early | Vines sprawl rather than climb | Gently tie young shoots to the arch every few days at first |
FAQ
Can I attach a trellis arch to a raised bed without drilling into the bed walls? Yes. T-posts and post anchors driven directly into the soil inside the bed walls work perfectly without touching the wood at all.
How long does a cattle panel arch last? Galvanized cattle panels can last 20–30 years. The T-posts may show surface rust earlier but remain structural for 10–15 years easily.
Do I need to remove the arch in winter? Metal and cedar arches can stay outside year-round in most US climates. PVC arches benefit from indoor storage in cold climates to prevent cracking.
What’s the cheapest trellis arch that still looks good? A cattle panel arch spray-painted matte black ($10 can of Rust-Oleum) looks sharp and costs under $80 total.
Can I grow vegetables and flowers on the same arch? Absolutely. Pole beans and sweet peas are a classic combination — they’re compatible, both look beautiful, and the beans fix nitrogen that benefits the whole bed.
Final Thoughts
A trellis arch is one of those backyard upgrades that costs very little but changes everything about how your garden looks and functions. You grow more, the plants stay healthier, and you end up with the kind of garden space that people actually want to spend time in.
Start with a cattle panel arch if you want fast and affordable. Move to cedar or iron when you’re ready for something more permanent. Either way, your raised bed will never look the same — and that’s exactly the point.